
BRUEN
Table of Contents:
- How to add new HR/Skills/Credentials (blue)
- What to do after Clinicians Upload Documents on the mobile app (blue)
- How to add Partners (green)
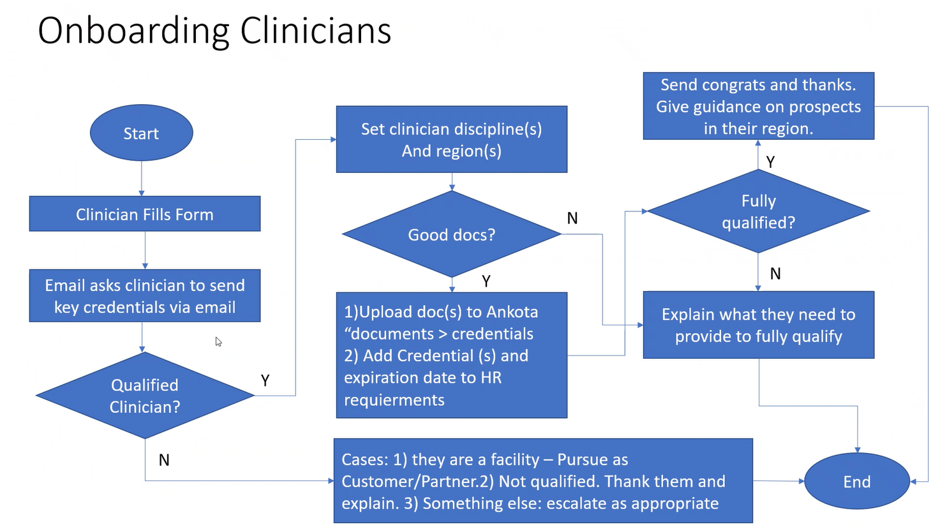
HOW TO ADD NEW SKILLS / HR / CREDENTIALS:
Step 1: Set up Required Documents
Please click link to add Required Caregiver Documents
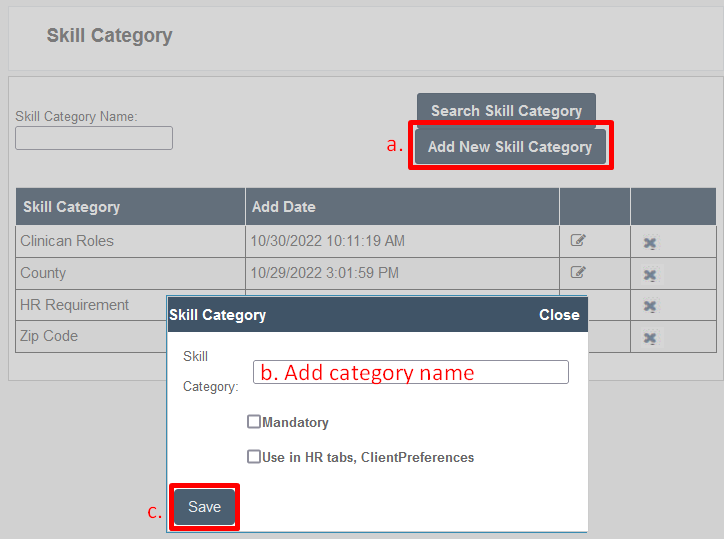
Step 2: Add Skill Category
- Go to Settings
- Click Skill Category
- Add New Skill Category
- Label
- Click Save
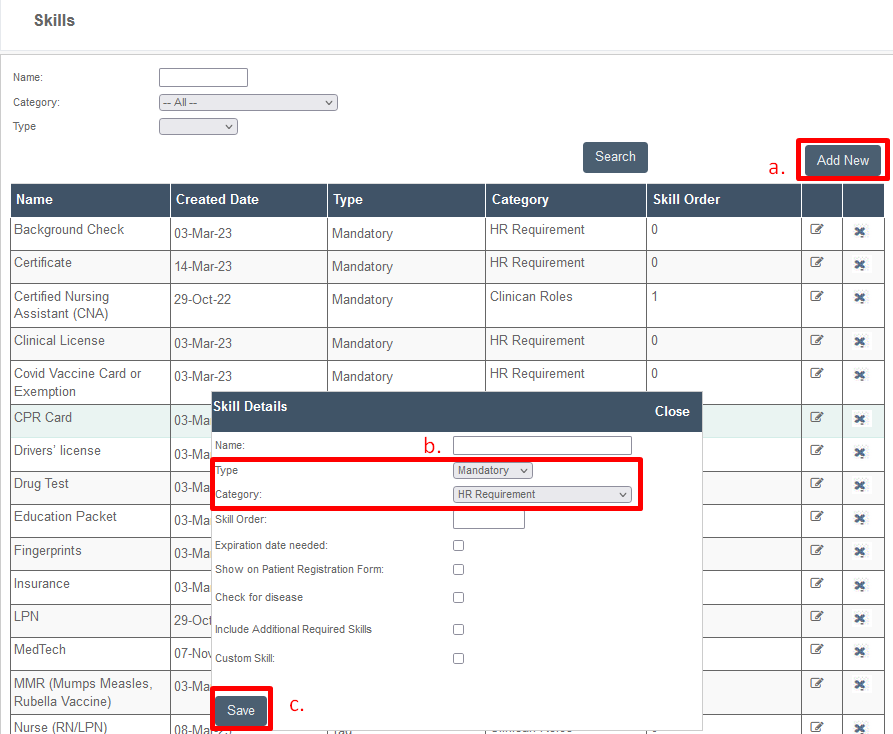
Step 3: Add Skill
- Go to Settings
- Click Skills
- Add New
- Label
- Type: Mandatory
- Category: HR Requirement
- Click Save
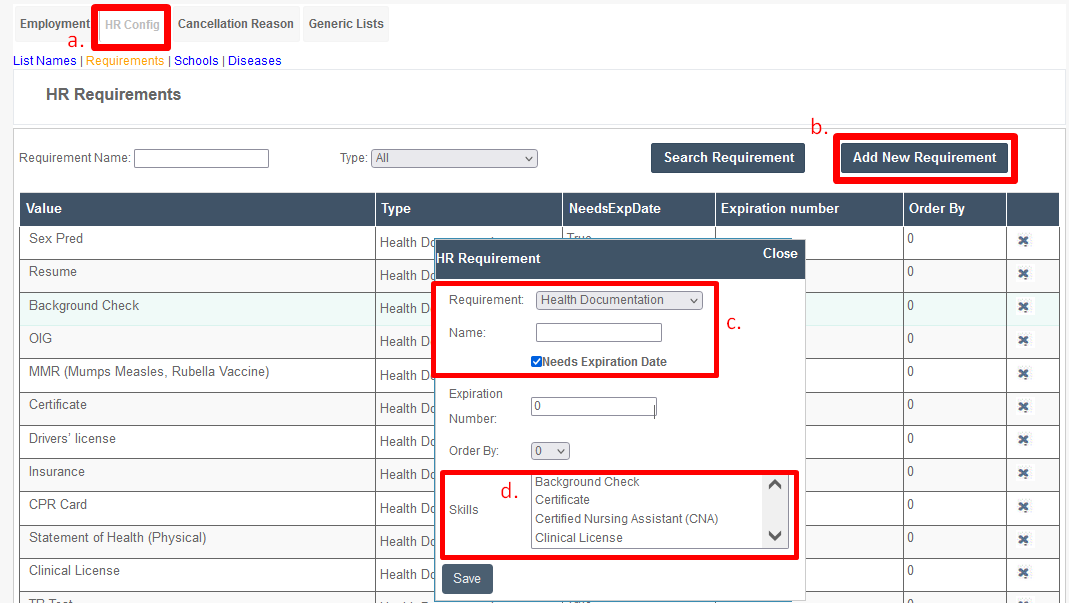
Step 4: Add HR Requirement (link to skills)
- Go to Settings
- Click Configurable List
- Click (a) HR Config Tab
- Add New Requirement
- Requirement: Select HR Folder
- Name
- Check: Needs Expiration Date
- Link Skill
- Save
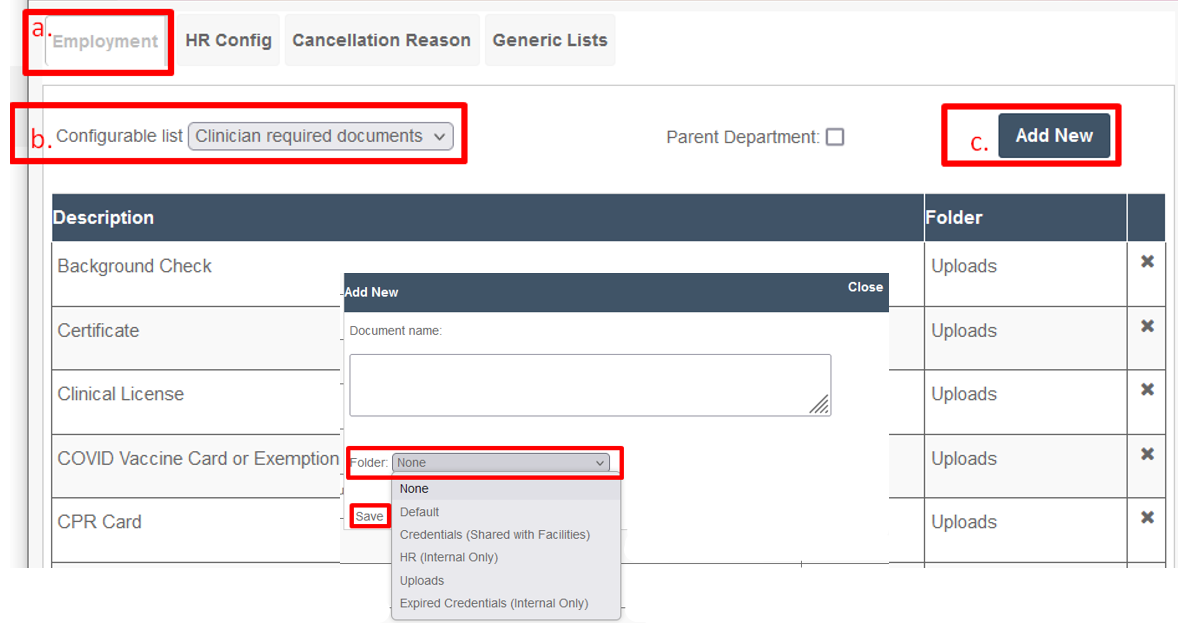
Step 5: Add Document to Mobile App Upload
- Go to Settings
- Click Configurable List
- Click Employment Tab
- Select Configurable List: Clinician Required Documents
- Add New
- Label
- Document Name
- Folder: Uploads
- Save
CONFIRM CLINICIAN'S DOCUMENT UPLOAD:
If you'd like a step-by-step tutorial on how clinicians can upload documents on the mobile ap, please visit HERE.
Once clinicians upload required documents on the mobile app, administrators will verify by...
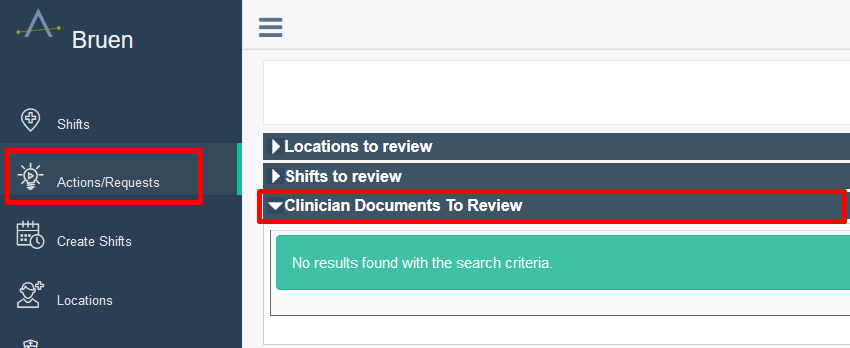
Step 1A: Checking for new uploads in Actions Requests
- Going to Actions Request
- Select dropdown "Clinician Documents to Review"
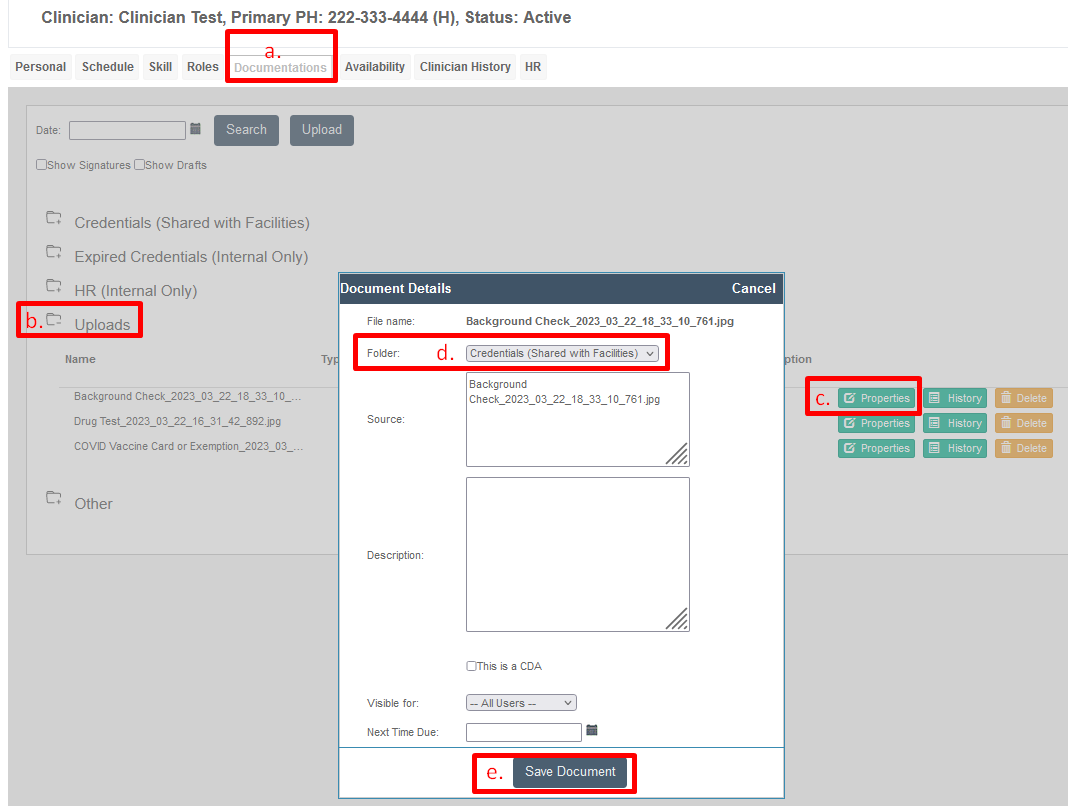
Step 2A: Changing Document Folder from Uploads > Credentials
- Go to Clinician's profile
- Click the Documents Tab
- Select Folder: Uploads
- Click Properties to Edit
- Change Folder to Credentials (shared with facility)
- Save
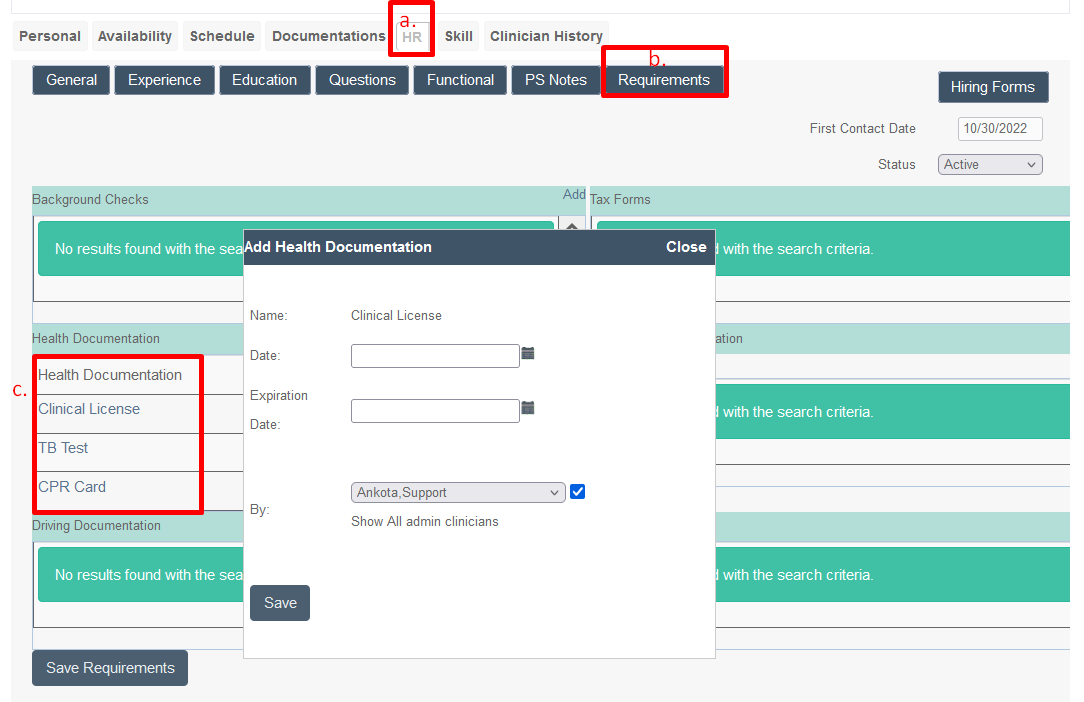
Step 3A: Adding expiration date on HR
- Click tab HR
- Click subtab Requirements
- Select uploaded document
- Add today's date
- Add Document Expiration Date - even if there is no expiration date, you still need to add a date
- Select who added the document
- Save
Step 4A: Confirm Document is listed in Skills
- Click tab Skills to confirm documents are listed under category: HR requirements
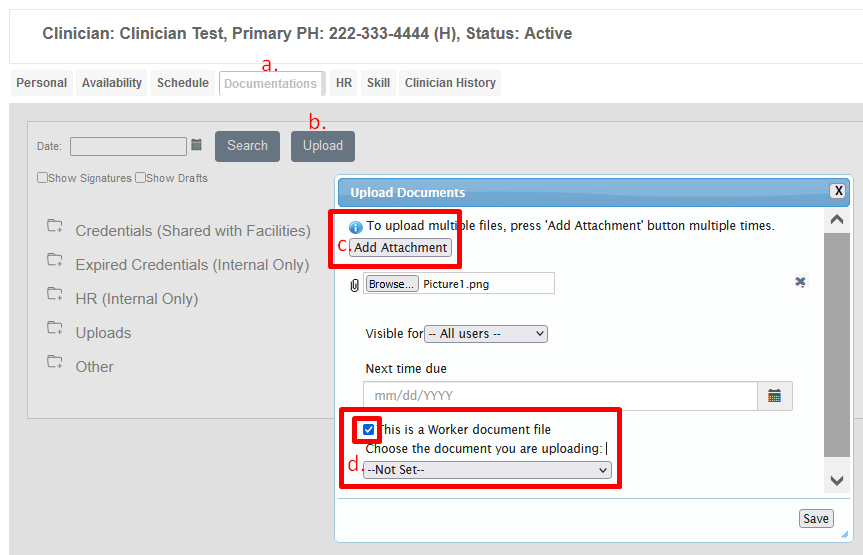
To MANUALLY upload document/credentials:
- Go to Clinician's profile
- Click the Documents Tab
- Click Upload
- Add attachment
- Check box: This is a workers document file
- Select document
- Save
- Repeat steps 2A to 4A above
HOW TO ADD A PARTNER:
Step 1: Create a Partner
- Go to Main Menu - Settings
- Click Partner
- Click Button - Add new
- add details
- Save
Step 3: Add Skill to Location Group
- Go to Main Menu - Settings
- Click Skills
- Click button - Add New
- Partner Name
- Type:
- Category: Location Group
- Save
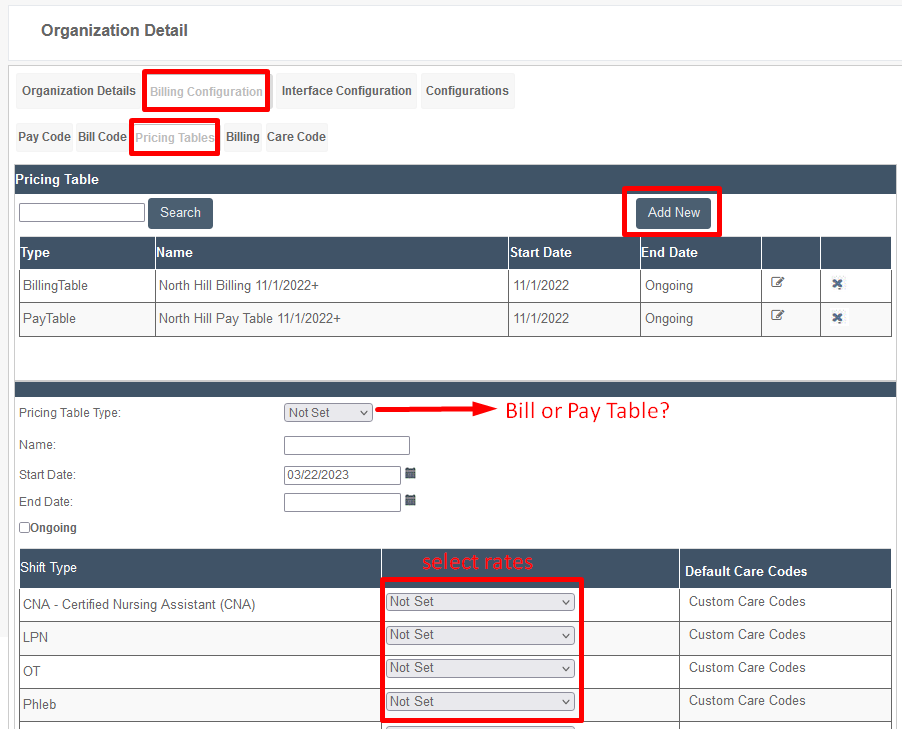
Step 4: Create a Pricing Table
- Go to Main Menu - Settings
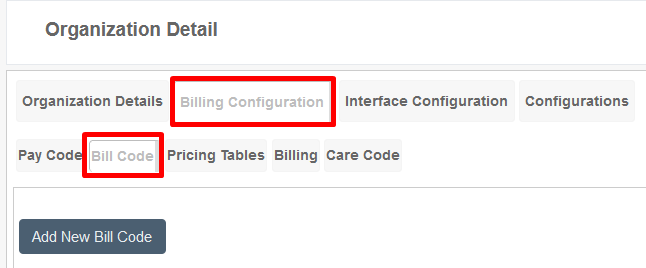
- Click Organizational Detail
- Click tab - Billing Configurations
- Click Subtab - Bill Code
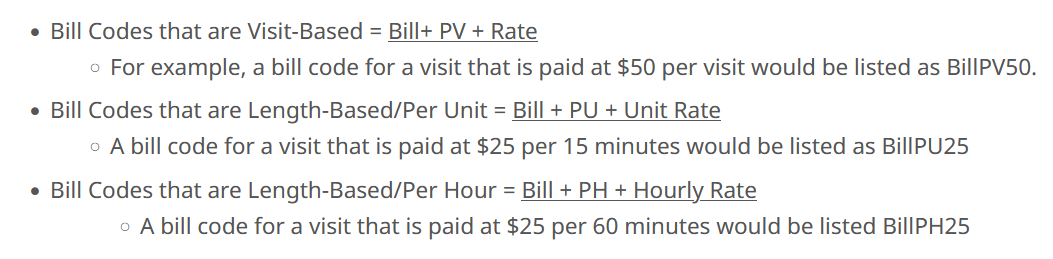
- Click button - Add New Bill Code
- Click Subtab Pay Code
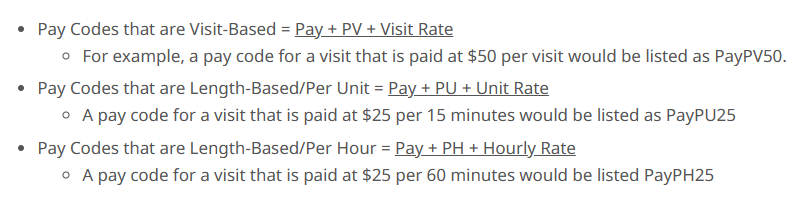
- Click button - Add New Pay Code
- Click Subtab Pricing Table
- Click button - Add New
- Pricing Table Type: Bill or Pay table
- Name: Partner Name w/ start Date
- Start Date
- End Date or Check box ongoing
- Select rates for each shift type at Partner Location
- Save
- Click button - Add New
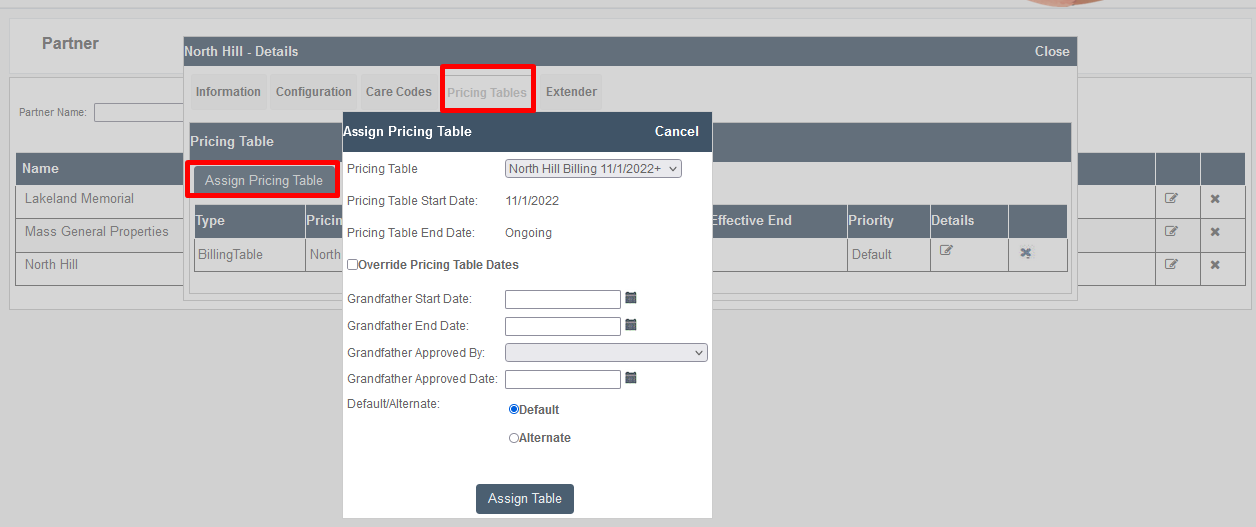
Step 5: Attach Pricing Tables to Partner
- Go to Main Menu - Settings
- Click Partners
- Edit Partner
- Click tab Pricing Table
- Click button - Assign Pricing Table
- Select Bill Table
- Assign Table
Step 6: Add a Location Profile
- Go to Main Menu - Locations
- Click Add New
- Add Partner details
- Select dropdown Partner: --
- Save
- Once the profile is created, go to tab: Skills
- Go to Category Location Group > Add
- Add Skill: Partner
- Save