Adding a Billing Adjustment
Overview
From time to time billing adjustments may be needed. These adjustments can be easily made using the adjustments functionality from the Main Menu. To enter adjustments, you can click New and then fill out the adjustment as needed. To review past adjustments, filter as desired, then click Search.
See below for further details.
Adding Billing Adjustments
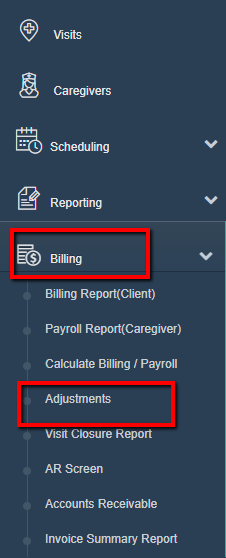
To begin, go the Main Menu, then click Billing, then Adjustments.

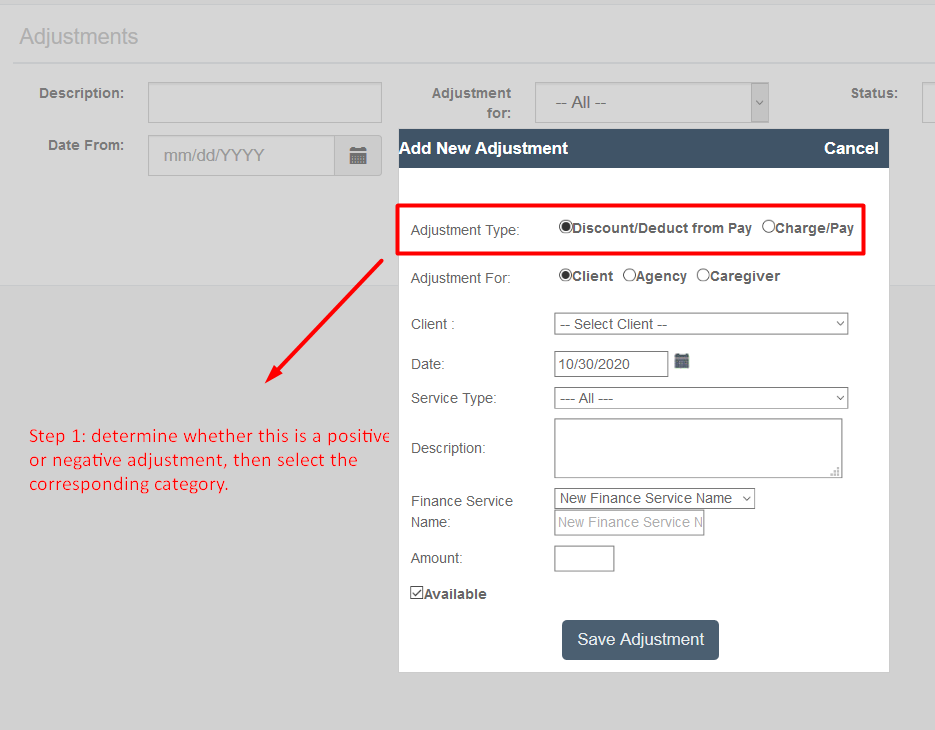
Next, select Add New Adjustment.

First, you must determine whether the adjustment is positive or negative. If it is negative, select Discount/Deduct from Pay. If it is positive, select Charge/Pay.

Next, select the appropriate category: Client, Agency, or Caregiver.

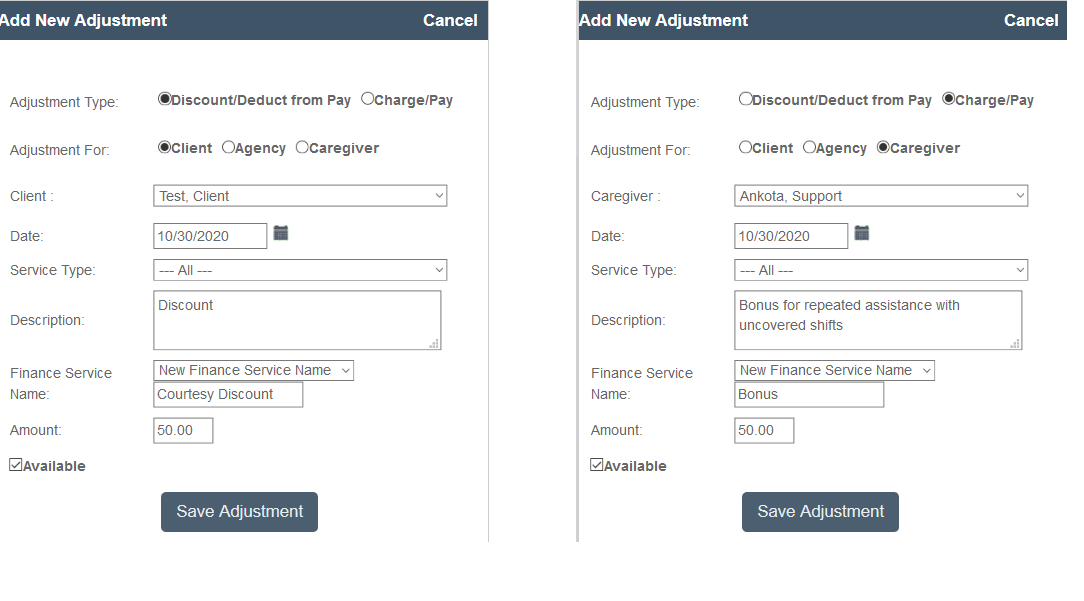
You would then complete the remaining fields as follows:
- Set the date to the date the issue occurred on (can be some date in future)
- Optional: enter a Service Type
- Type a short description
- Enter a Finance Service name if desired
- This is how the adjustment will be shown on the invoice or payroll statement
- Put in the dollar amount to be adjusted as a positive number
- Even when the number is negative (a discount, in the first example), the dollar amount is still entered as a positive number.
- Leave "Available" checked
- This indicates that the adjustment will be applied on the next invoice or payroll statement
- Click Save Adjustment
See below for examples.

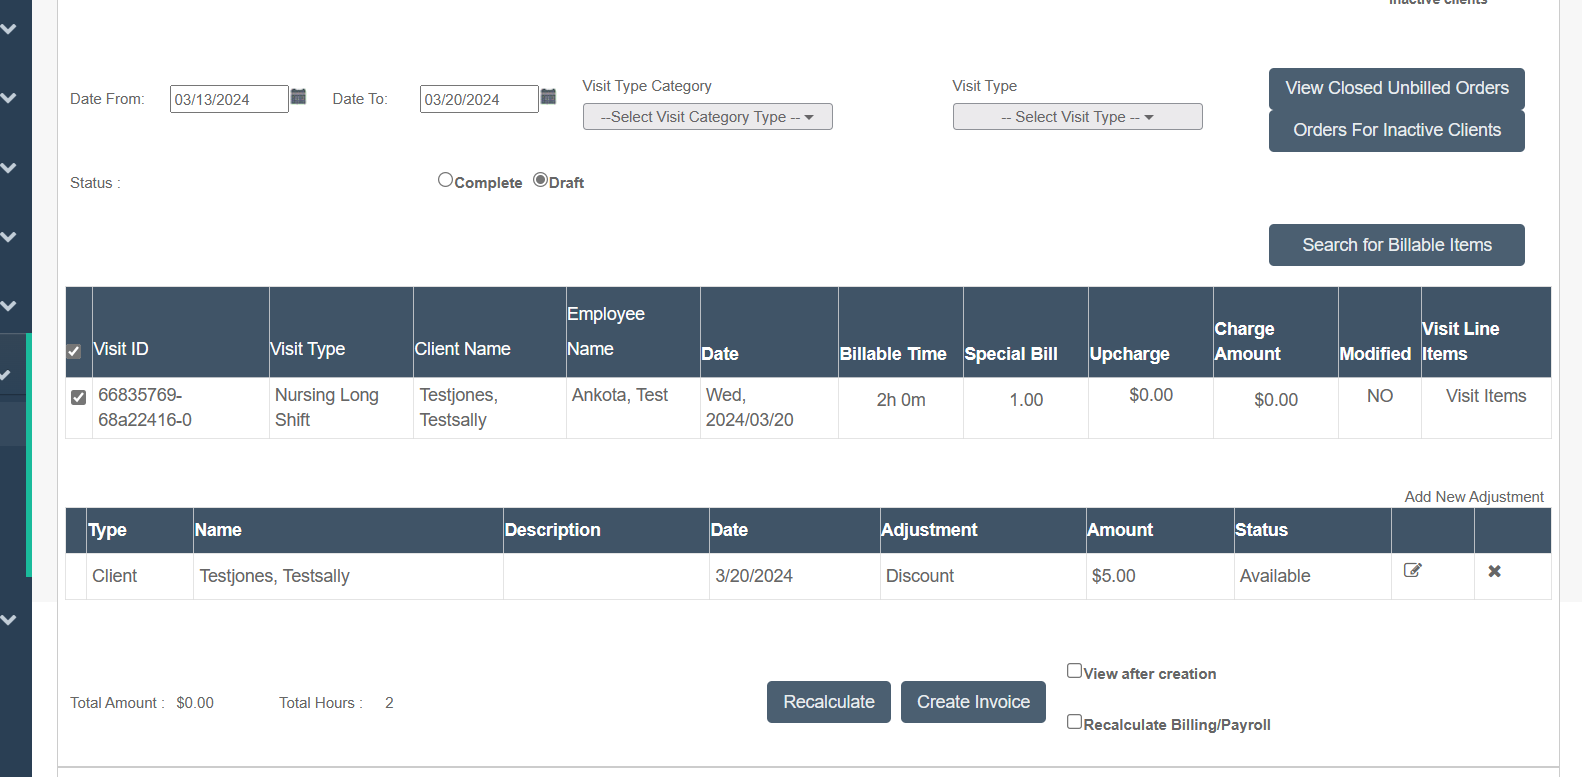
After the adjustment is made, go to the calculate billing screen and search the client/date range. If the adjustment does not show the first time, please hit Recalculate to pull the new change.
The screen should look similar to the one below.

Then select Create Invoice and review in billing report drafts and complete as needed.
Again, to review past adjustments, filter as desired, then click Search.
