Setting A New Care Plan Category
Overview
While Ankota builds your initial care plan categories during implementation, you may wish to add new care plan categories after you are established. This is an easy process, described below.
Creating New Care Plan Items Categories
To begin,
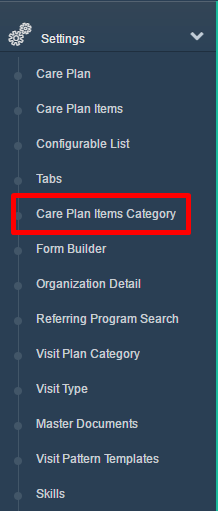
- Go to the Main Menu
- Click Settings
- Click the Care Plan Items Category
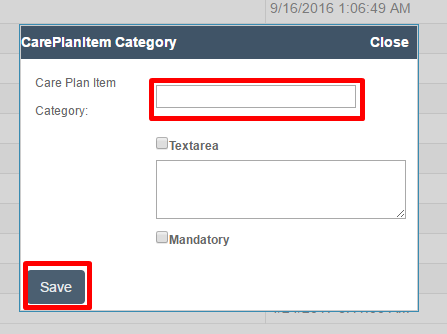
- Select Add New Care Plan Item Category.
- Enter the name of your new Care Plan Item Category and Save.
Setting the Order of Categories via Tabs
Once you're completed creating the categories, you may wish to re-set the order of the categories by updating Tabs. This will ensure that the care plan item categories are in the order you prefer when you are building care plans for clients.
To set the order of tabs,
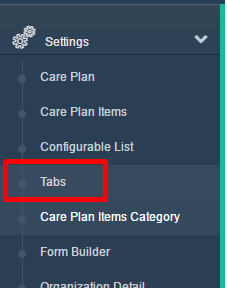
- Go to Settings
- Click Tabs
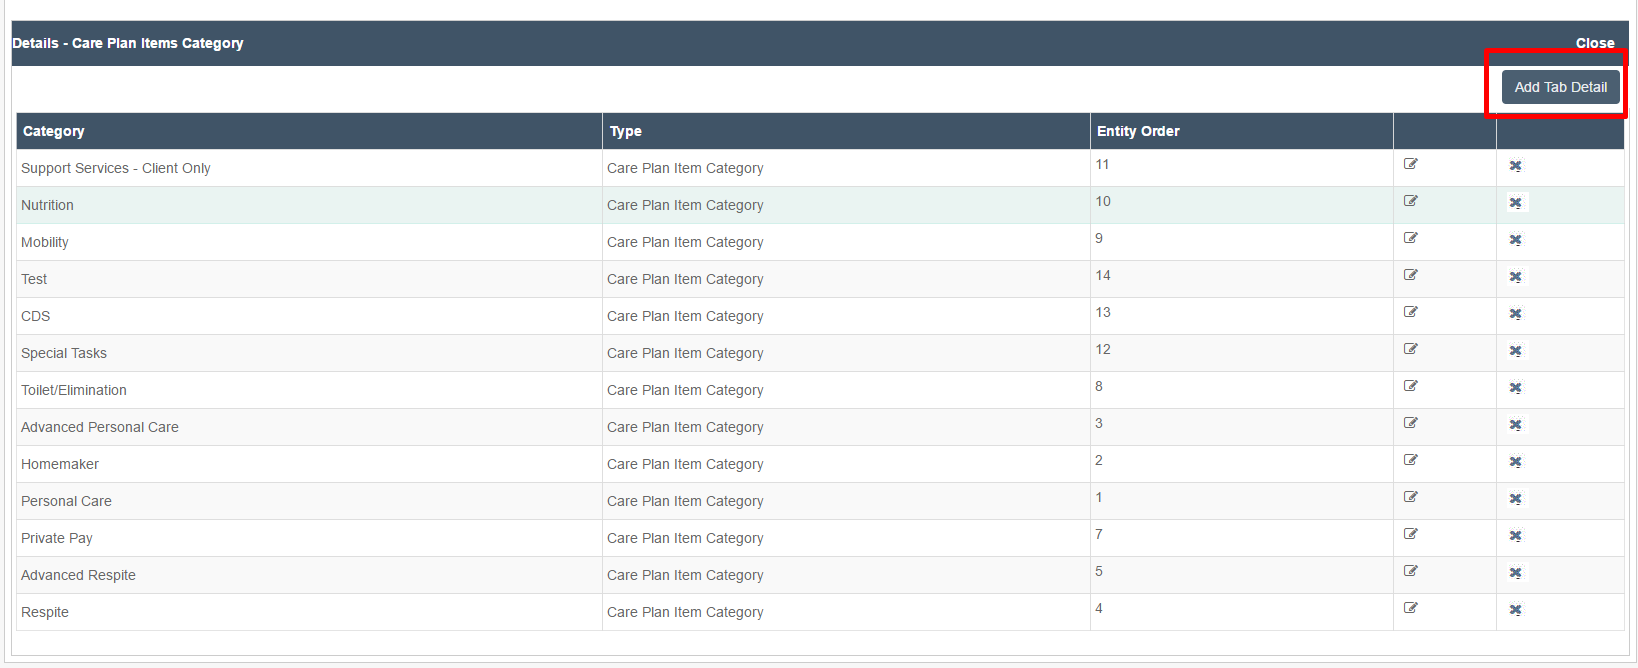
- Click View Tab Detail.
- Then select Add Tab Detail.
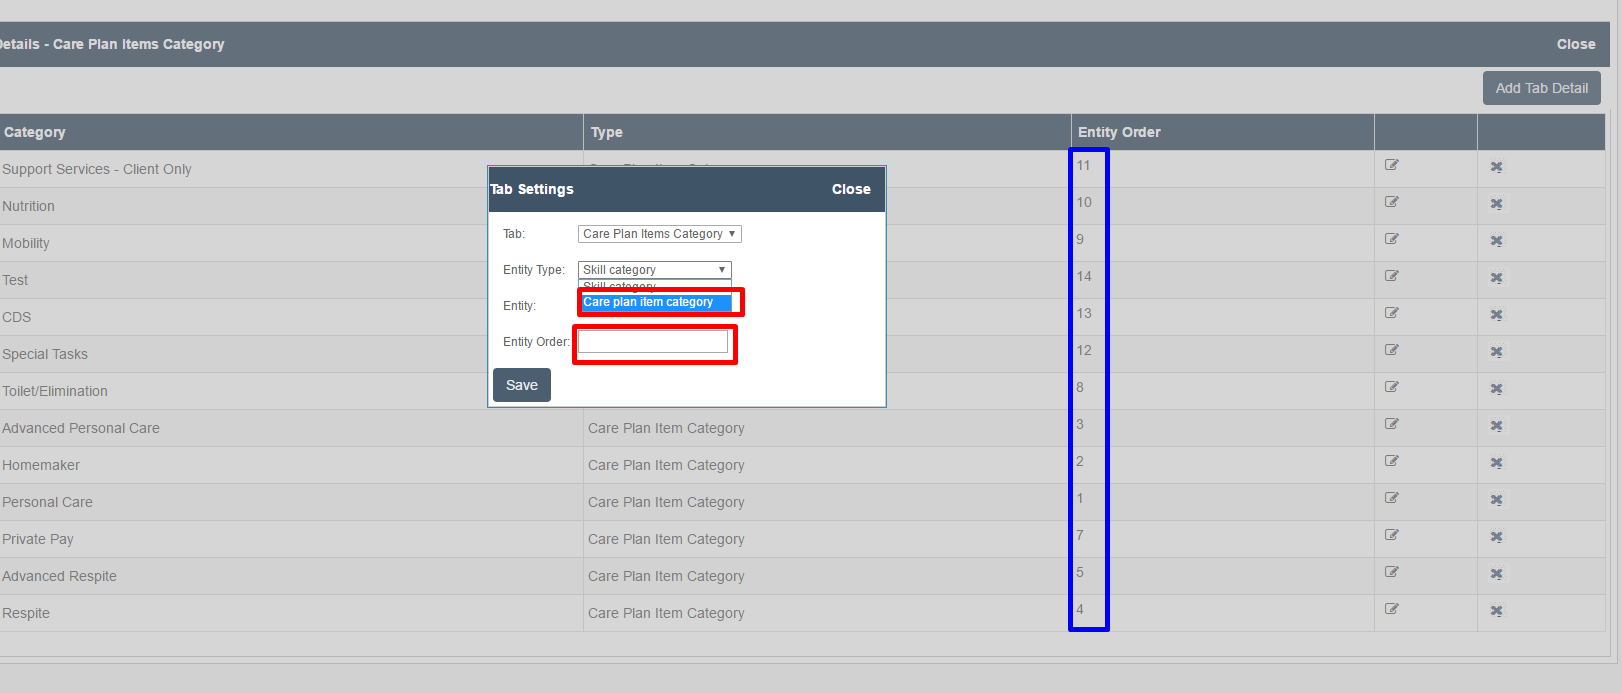
Note the tab will remain as Care Plan Items Category. To complete the update,
- Change Entity Type from Skill Category to Care Plan Items Category
- Select the new Category from Entity
- Enter the order of the Care Plan Item
- Outlined in the image below in below in blue is where you can see the other items in order. Generally you will choose the next highest number. In this example we would choose 15.
- Click Save
After completing these steps, a care plan item can now be assigned to this category.
Special Features
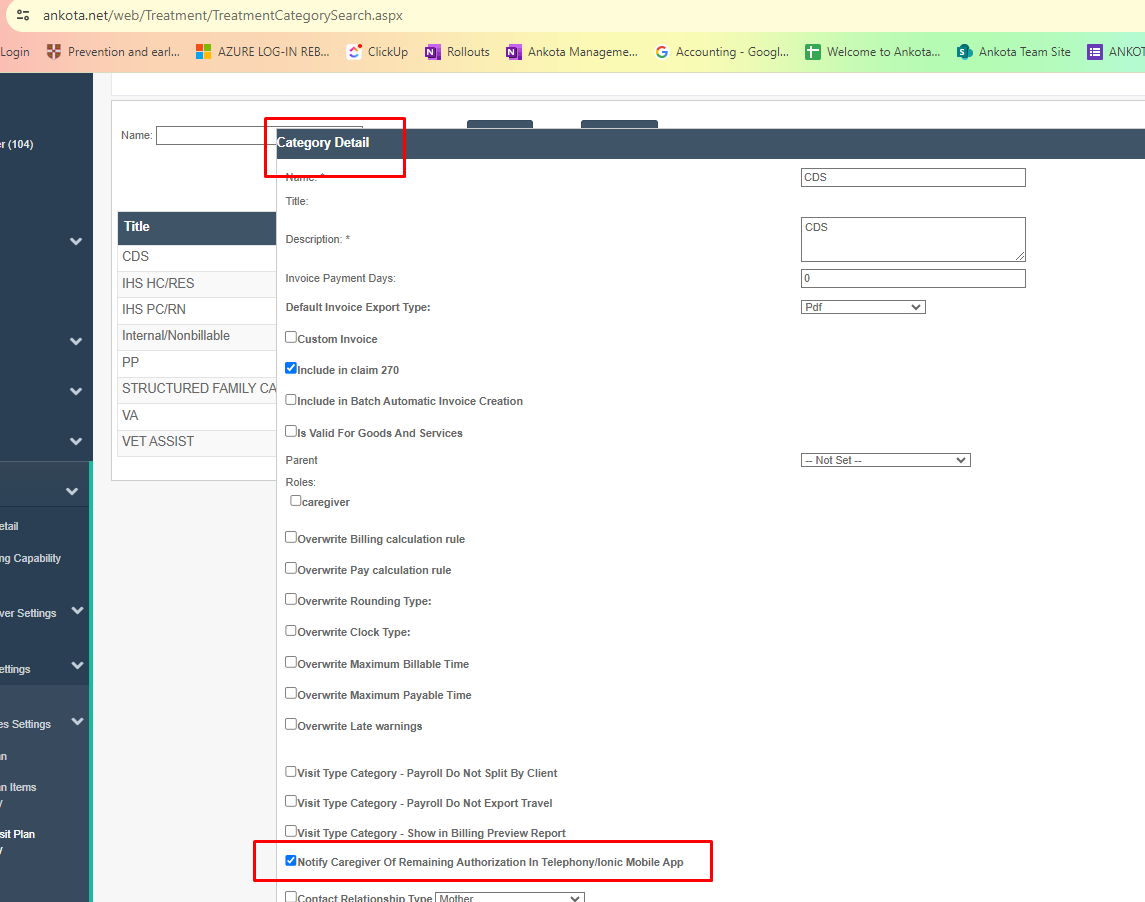
A new special feature is to allow caregiver's to see their remaining authorizations in the Ankota Caregiver App and Telephony.
In order to turn this on, you will go to the care plan category.
- Click Settings
- Select Service Settings
- Click Care Plan Category
- Select the Category
- Check the box Notify Caregiver of Remaining Authorizations in Telephony/Ionic Mobile App
- Save
