Adding a New Caregiver (Demographics)
Overview
Adding caregivers to Ankota is a simple process. The critical function for a caregiver is to be able to clock in and out using the Ankota system. To do this, only the caregiver's name and log-ins for telephony and the mobile app need to be entered. Administrators can be added as desired.
The walk-through below will guide you through this process.
State Specifics
Please note the directions below are universal. If you have state specifics (such as Sandata aggregator requirements for caregiver SSN numbers, or the Missouri FCSR caregiver ID requirement), you will need to ensure you meet them. See your state guide for further details.
Adding a Caregiver (via Registration Form)
Adding a new caregiver is simple with the registration form. Simply go to the Caregivers page, click Add New, and fill out the form. These are the key points:
- You can choose which fields are visible
- You can fill the form out as an admin, creating an active profile
- Alternately, you can send the form to caregivers to fill out
- All caregivers who complete the registration form will create a Pending profile
- If desired, Ankota can set a notification to an administrative email that a new caregiver has been added to the system
- If you plan to send the page to caregivers, you will probably want to include all fields
- The only critical information for a functional EVV profile is a name and an EVV log-in
- As always, Medicaid providers should review their state guide to ensure caregiver profiles are set up to meet state requirements.
Options for the caregiver registration page include:
- Name
- Gender
- Mobile App/Ankota.net User ID and Password
- Telephony/IVR/Mobile User ID and Password
- Pay Rate
- DOB
- FCSR ID
- Caregiver ID & Caregiver Code
- SSN
- Role
- Hire Date
- Emergency contact
- Address
- Phone
- Availability
- Referral
- Valid license (Y/N)
- Conviction of felony (Y/N)
- Educational information
- Work experience
Sample Caregiver Registration Form, Short
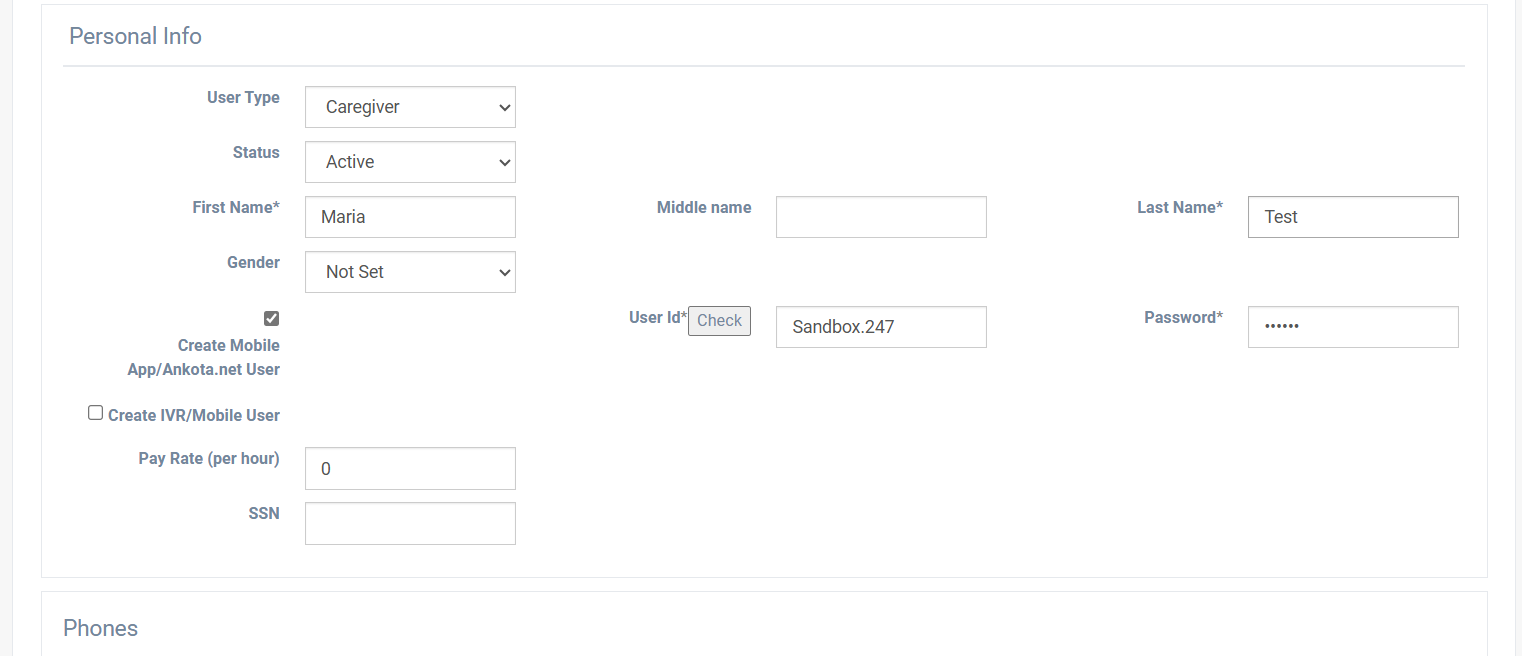
Create Mobile App/Ankota.net User
On this page, you can create a Mobile App/Ankota.net User Id. This information is used for the caregiver to login to the Ankota Caregiver App and the web version ankota.net/employee. Simply check the box and a user ID and Password will be generated. (In order to find the auto-generated password for the caregiver you will need to have the checkbox selected to allow text messages next to the phone number. As well as select the button "send the login information" on the caregiver page. This will send a text to the caregiver with the user login and password.
Addresses

Emails

Phones
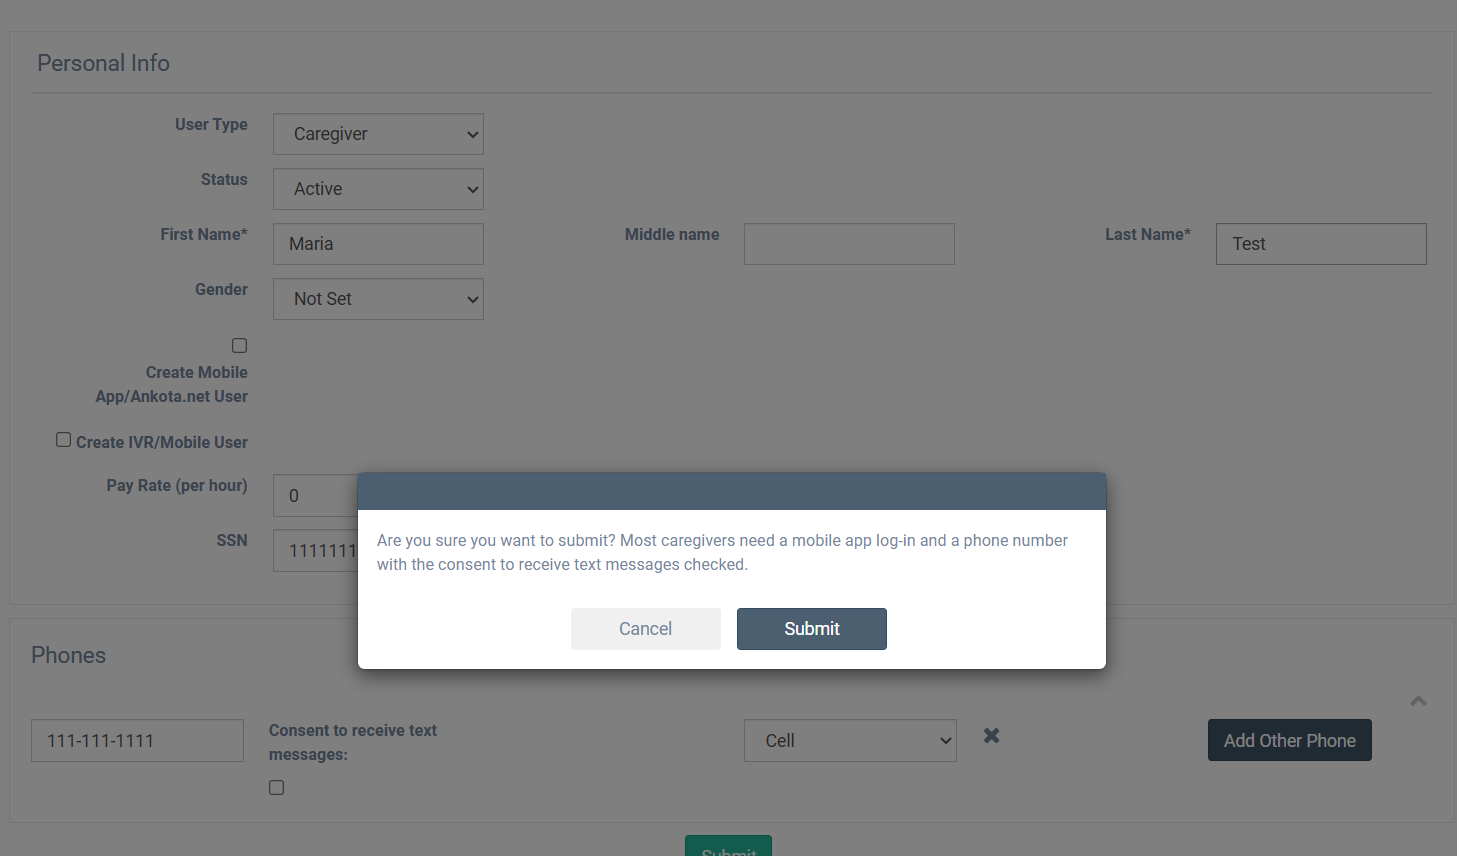
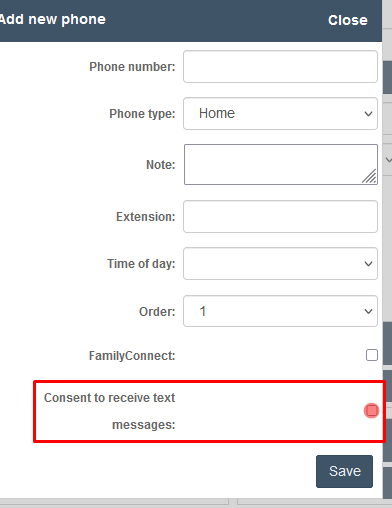
On this page, you can mark the phone number for consent to receive text messages. This is helpful for Admin, so caregivers can receive test messages from Administrators.

If the checkbox is not selected, a message warning will appear.
Adding a Caregiver (via Profile)
Some companies may go direct to the Profile page when they click Add New. (If you would like to see the Caregiver Registration Page instead, reach out to Support to have that page added.)
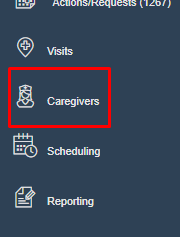
To add a new caregiver via the profile page, begin by clicking Caregivers in the Main Menu.
When the Caregivers screen appears, click Add New.

A blank caregiver screen will appear. Note the tabs along the top of the record.
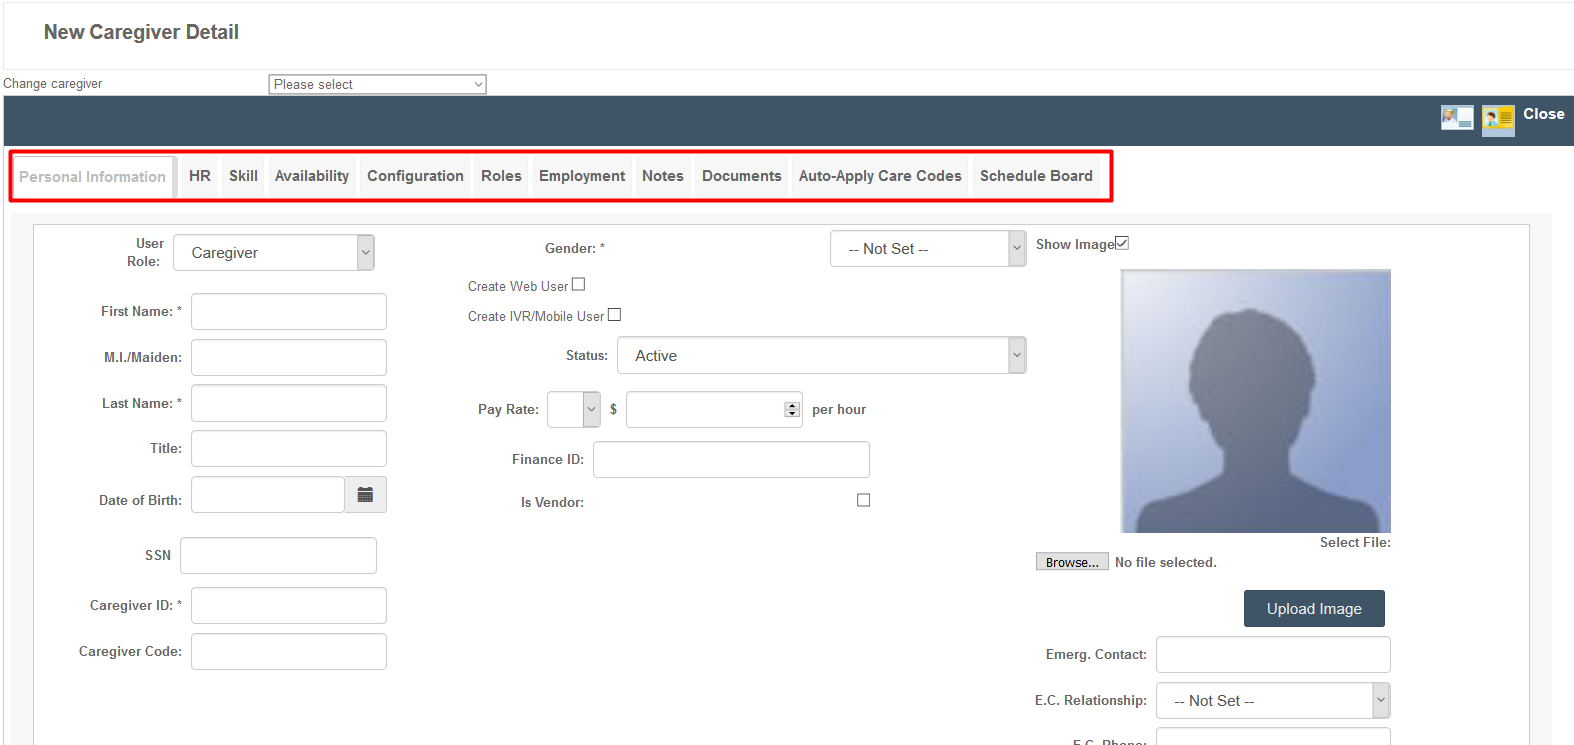
Start by entering the personal information for the caregiver. The only required fields for a functioning caregiver profile (with EVV) are as follows:
- First name
- Last name
- Web user ID and password
- The user ID is typically the organization's Ankota name, then the caregiver's first initial and last name OR their caregiver ID; for example, abc.jdoe or abc.1234
- The password is typically "password" because it will be re-set the first time the caregiver logs in
- Telephony ID and password
- The telephony ID should match the Caregiver ID
- The password used is typically the last 4 digits of the SS#
We also encourage clients to enter the following data for a better experience:
- Pay Rate (for payroll)
- Social Security number (so the Telephony PIN can be based on a private piece of data the caregiver has access to)
- Address (so travel time distances can be calculated if desired in the future)
- Phone number (for text messages)
- Email (for email communication)
- Caregiver ID (for tracking; some states require this)
- Caregiver Code (for tracking; some states require this)
- This field can be customized should you state need additional credentials for tracking, such as a NPI. Please reach out to Support to have this field configured for your state's requirements.
See below for a more detailed walk through of data entry.
Fundamental Data
First, enter the staff member's first and last name.
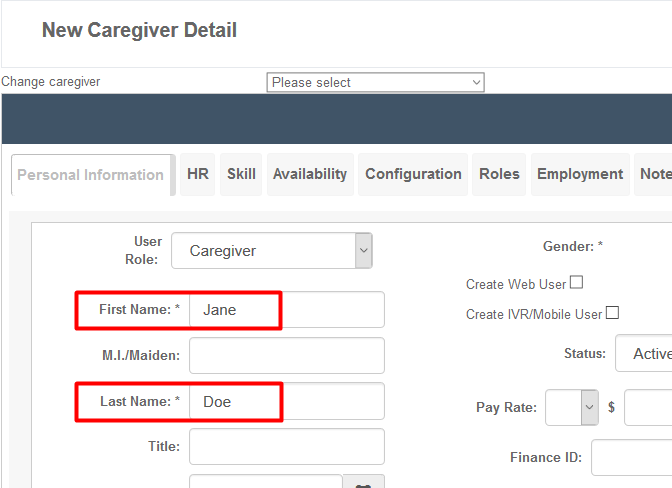
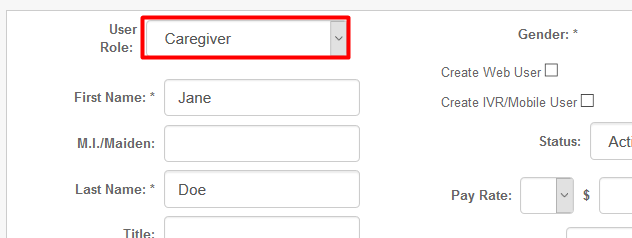
Next, select the user role. Caregiver is the default role, so there is no need to change the role to add a standard caregiver. For administrators, select Administrator. If you have more than one administrative role type, please reach out to an Ankota specialist for assistance in selecting the correct role.
Next, you will need to turn on the telephony functionality.
To turn on telephony, check the checkbox for Create IVR/Mobile User. This will open the IVR/Mobile User setup fields for User Number and PIN. The system will give you the next available user number.

If you prefer to use a different number than the suggested number, such as an internal caregiver ID, simply enter the alternate number. You can verify its usability by clicking the Check button to ensure that each ID is unique. (Assigning two caregivers the same ID will prevent both from being able to clock in or out.) Valid numbers will result in a Valid confirmation, and preexisting numbers will be marked with an exclamation point and a red Exists.


Next, enter the PIN, a four-digit number. We generally suggest you use the last 4 digits of the caregiver's Social Security number.

When this is finished, scroll down and click the Save Personal button.
Next, you will need to turn on the mobile app functionality.
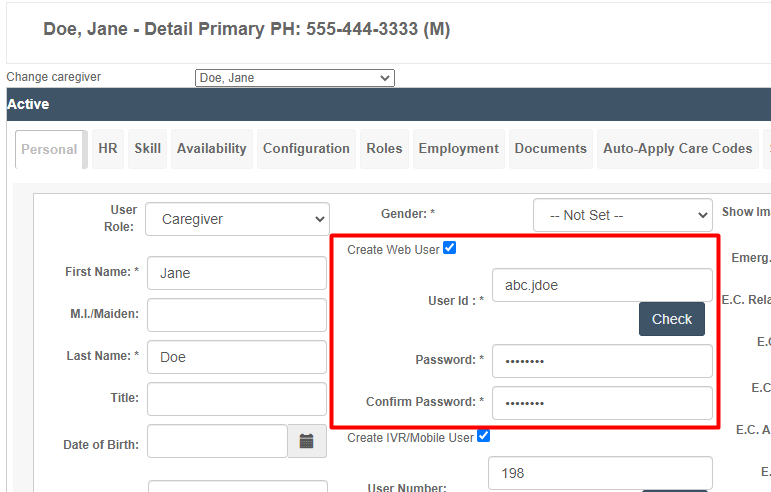
To turn on the mobile app functionality, check the checkbox next to Create Web User.

This will open the User ID and Password fields. The standard user name is the organization name, a dot, and first initial, last name. For example, Jane Doe of the ABC organization would have abc.jdoe as her user ID. Alternately, some organizations may prefer to use the caregiver's ID number instead of name, so that the mobile app log-in is abc.1234.
The password is defaulted to a minimum of six characters, and must be entered the same way in both the Password and Confirm Password fields. We usually recommend using password as the temporary password, which can be replaced the first time caregivers log in to the mobile app.
When this is finished, scroll down and click the Save Personal button.

Additional Data
After creating the initial profile, you can choose to add additional data to the profile. We particularly recommend adding a pay rate, Social Security number, address, phone number, email and caregiver ID.
To add a pay rate, simply type in the rate in the larger pay rate window.

To add the Social Security number and caregiver ID, simply type in the numbers into the appropriate windows. Note you can choose to use an existing caregiver ID, or you can copy the suggested ID from the telephony/IVR field. We generally suggest that the telephony/IVR ID and the caregiver ID should match.

To add gender, select gender from the drop-down gender window.

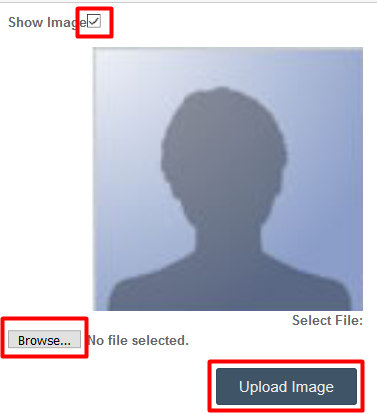
To add a photo, check the box next to Show Image on the right of the profile. This will open a blank window. Browse for your photo using the Browse button, select the caregiver's photo from your computer, then click the Upload Image button.
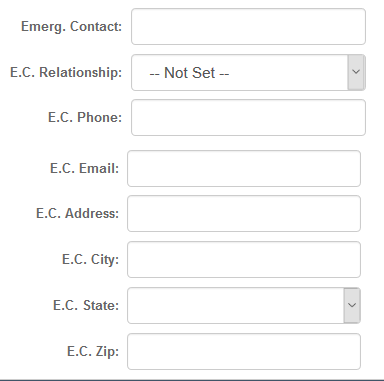
To add an emergency contact, simply fill in the Emergency Contact fields.
To add an email, phone number, or address, scroll to the bottom where the navy blue bars for address, email, and phone are. Click "Add" on the item you wish to add, then fill in the appropriate data.

Should you wish to have the ability to text caregivers, you will need to enable the "Consent to receive text messages" functionality. The process is as follows:
- go to caregivers from the main menu
- Search for the caregiver whose number you wish added to receive text messages
- Click on their phone number
- Check the box next to "Consent to receive text messages"
- Click "Save"
Now save the record by selecting Save Personal in the lower left of the screen.
NOTE: Ankota supports multiple addresses for each caregiver by type (e.g., home, contracted facility, etc.). You can set one address as Primary. In addition, please be sure to use the Address 2 section for apartment or condo numbers.
Adding Caregivers - Video
