Web Caregiver Availability Calendar: A Comprehensive Guide
Overview
The new Caregiver Availability Calendar provides a streamlined and efficient way for caregivers to manage their work time and communicate time-off conflicts to their agency.
This feature moves beyond simple shift requests, offering a clear visual of your scheduled availability and any non-working periods.The Availability Calendar is your central hub for schedule management:
Time Slot Management: Easily create, edit, and delete daily availability time slots.
Date Range Flexibility: Define availability for a "Base Calendar" (default) or for specific date ranges (current/future changes).
Conflict Detection: The system automatically checks for overlaps with existing availability and highlights time-off conflicts.
Time Off/Conflict Visibility: View your approved and pending time off requests side-by-side with your availability.
Templates: Create unique templates and be able to share templates with other caregivers as well.
See below for a walkthrough of the screen and its functionality.
The following article includes:
Adding a New Availability Time Slot
Overlapping Availability Conflicts
Adding a New Time off/Conflict Slot
Please note the following article is directed to the user(caregiver) for easy copy-and-paste to users.
Managing Your Availability
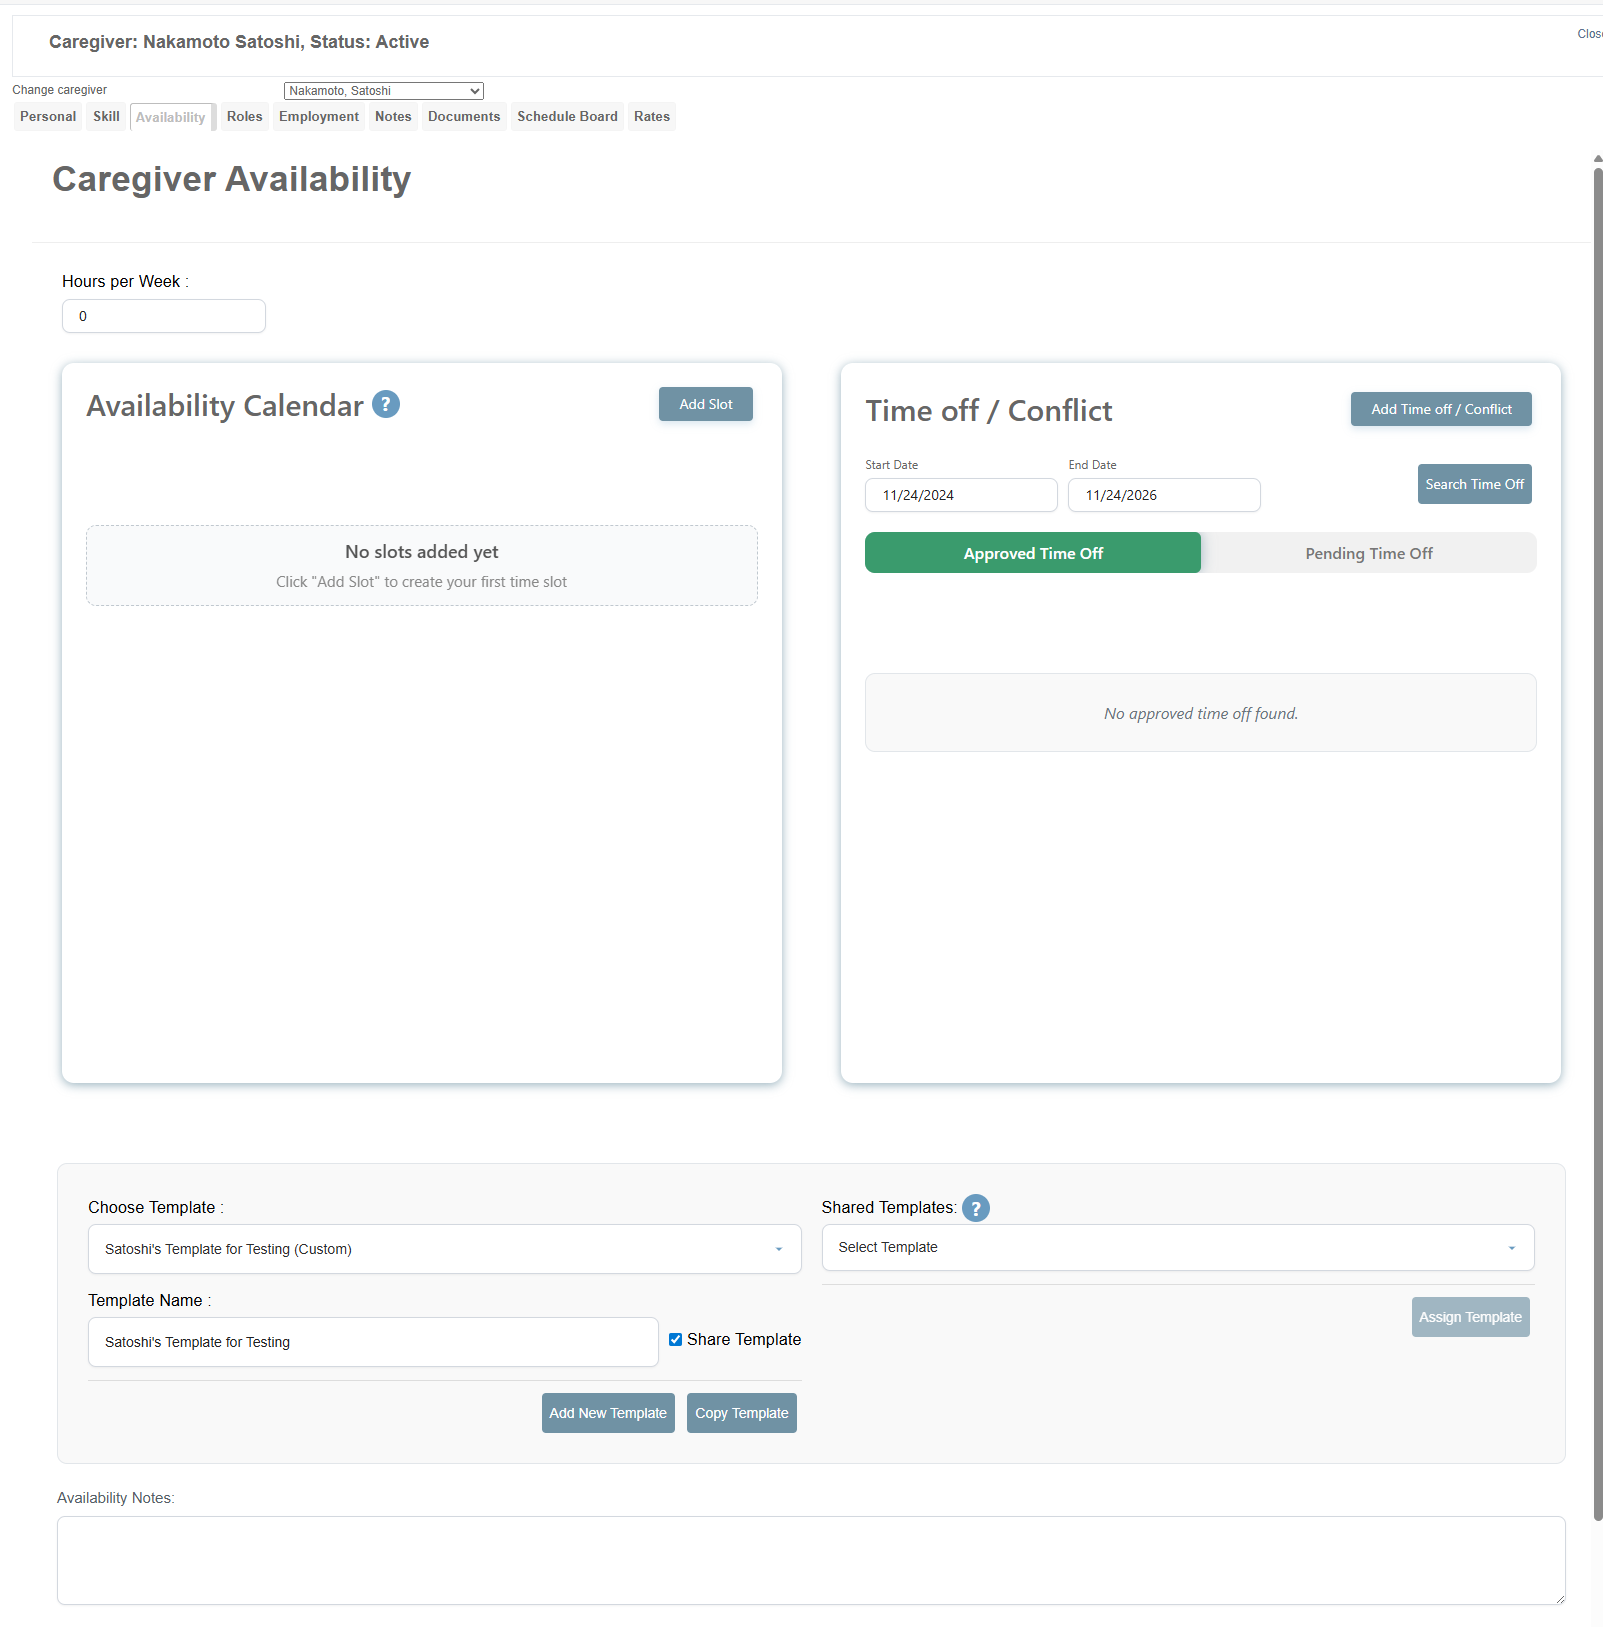
The Availability tab within your Employee Details screen is divided into three sections: the Availability Calendar on the left, the Time off / Conflict section on the right, and the Templates section at the bottom.
This is the first view you get if you are a new user:
Hours Per Week
At the top of the Configuration area, you can set your Hours per Week. This is a target number that helps the system and administrators understand your desired total working hours.
Adding a New Availability Time Slot
To add a new block of working time:
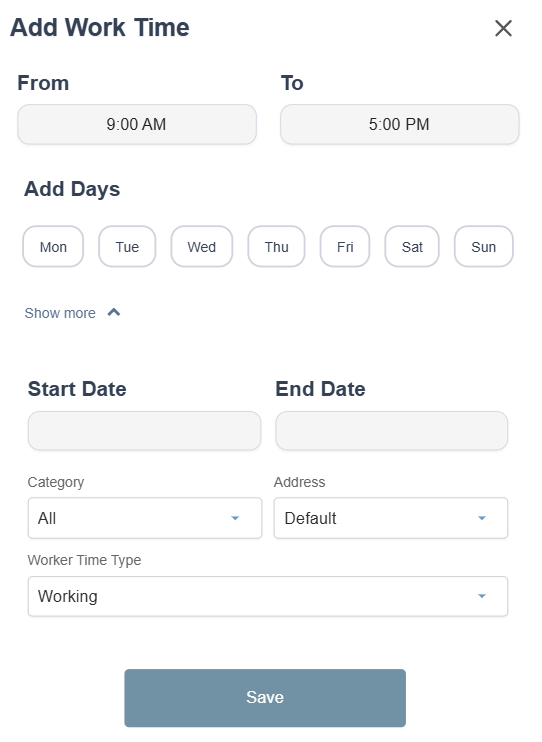
Click the Add Slot button under the relevant calendar (Base Calendar or a Date Range Calendar).
The Add Work Time window will appear.
Set the "From" and "To" times for the availability slot. (e.g., 9:00 AM to 5:00 PM).
Select the Add Days for this time slot (e.g., Mon, Tue, Wed).
Click Show More to reveal optional fields:
Start Date / End Date: If you want to make a availability calendar for a date range
Category / Address: Optional properties for defining the nature or location of the work.
Worker Time Type: Select Working or Available or other options to specify the nature of your time.
Click Save. The system will process your request and update the calendar.
Availability Calendar
This section is where you manage your work time slots.
Base Calendar: This is your default, ongoing availability. It does not have an end date and will apply perpetually until you create an overlapping date-range calendar.
To make a base calendar, add a time slot without specifying a date range.

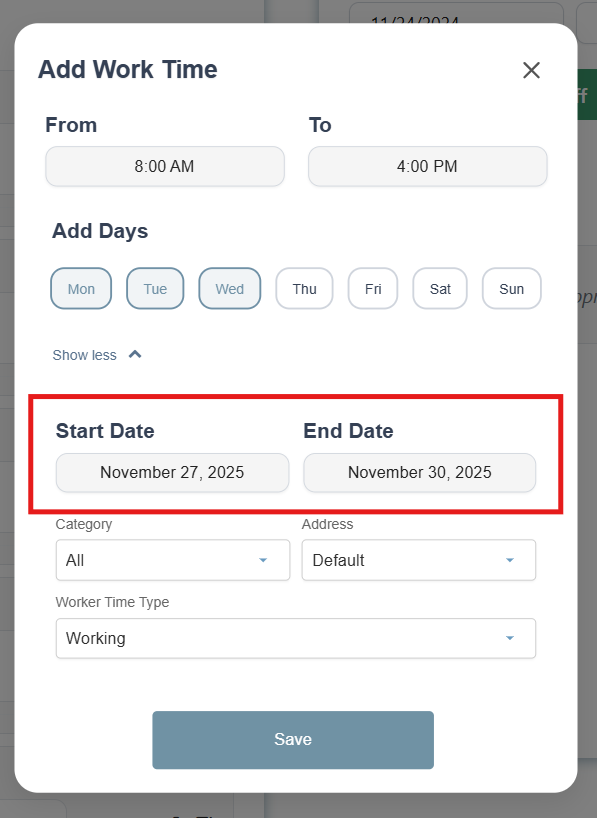
Date Range Calendar: When you set a specific Start Date and End Date, a new calendar is created. This temporary schedule will override the Base Calendar only for the specified date range and will always display on top when active.
Example: Your Base Calendar is Mon-Fri, 9 AM - 5 PM. You create a Date Range Calendar for Nov 27 - Nov 30 to work Mon-Wed, 8 AM - 4 PM. During those four days, the Date Range Calendar is effective. Before and after those dates, the Base Calendar is used.
Overlapping Availability Conflicts
The system is designed to prevent contradictory availability entries. If the time range and days you select overlap with an already existing calendar, an Overlap Detected message will appear.
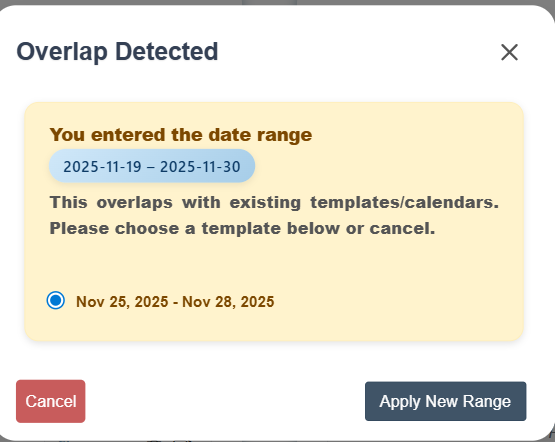
Scenario 1: Date Range Conflict: If you try to save a new calendar whose date range overlaps with an existing date-range calendar, you will be prompted to select which range to keep. You can either cancel to select a new date range or click on "Apply Range Button" to map your enetered date range to the exisiting date range calendar.
Scenario 2: Time Slot Conflict: If you try to save a time slot that conflicts with an existing slot on the same day within the same calendar range, an error will specify the conflicting time.
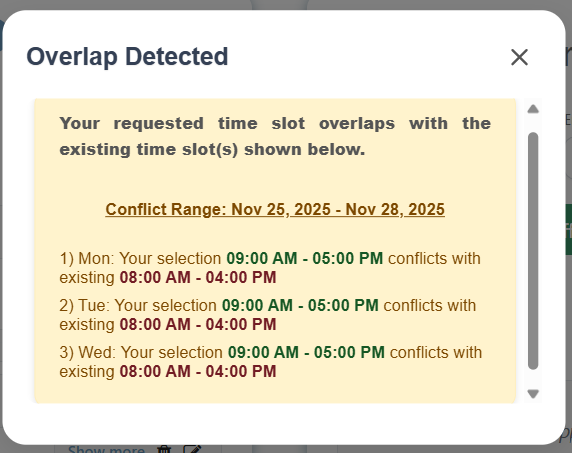
Resolution: You must adjust the dates or the specific time slot to resolve the conflict before you can successfully save the entry.
Editing an Existing Time Slot
You can easily modify any existing time slot.
Locate the time slot you wish to change within the appropriate calendar day, click the pencil/edit icon next to the time slot, edit and save.
Deleting Availability
You have two options for deleting availability:
Delete a Single Time Slot: Click the trash can icon next to the specific time slot you want to remove.
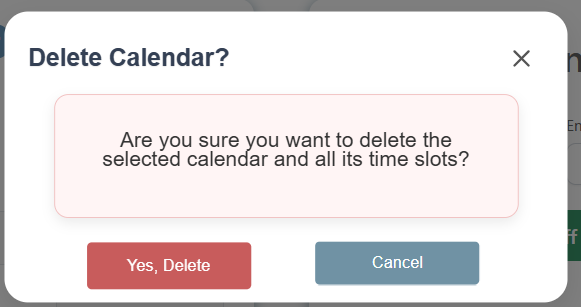
Delete an Entire Calendar: Click the Delete Calendar button below the calendar name. A confirmation window will appear, and you can click on yes to permanently delete the calendar.
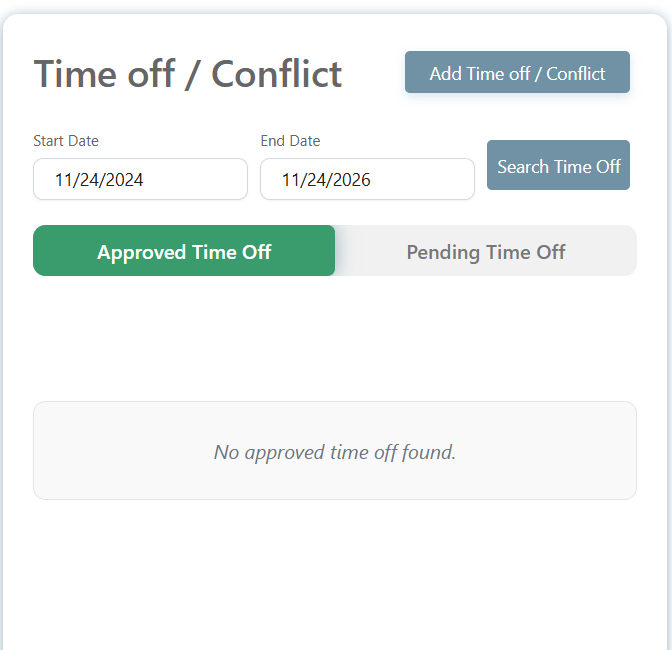
Time Off / Conflict
This section provides a summary of any time off you have requested or been granted.
Approved Time Off: Days that your agency has approved as non-working time.
Pending Time Off: Requests for time off that are still awaiting approval.
Search Time Off: Allows you to enter a date range to view specific time off requests.
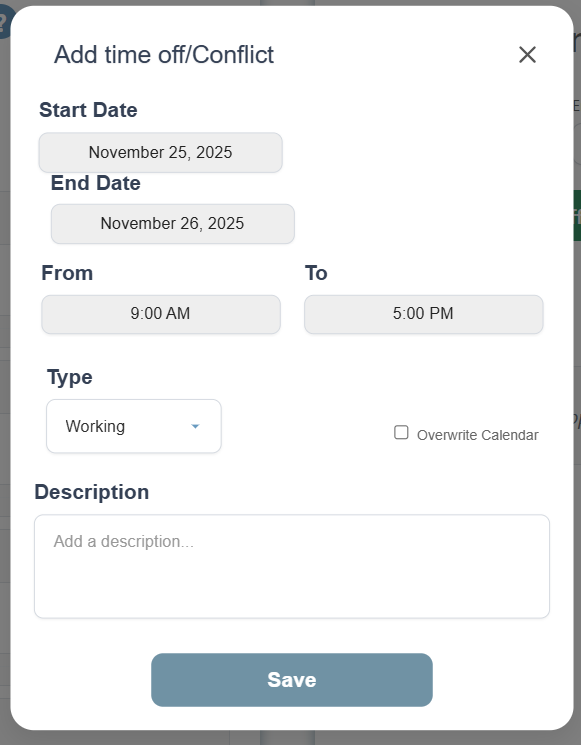
Adding a New Time off/Conflict Slot
To add a new block of working time:
Click the Add Time off/conflict Slot button in this section
The "Start Date" and "End Date" for when you have any other commitments
Set the "From" and "To" times for the conflict slot. (e.g., 9:00 AM to 5:00 PM).
Select the type of your conflict/time off. e.g. unavailable, busy, standby etc.
Any other desciption you want.
Click Save. The system will process your request and your entry will pop up in the pending time off section.
Pending Time Off
This section is where you edit, view, and approve any pending time off/conflict.
If you have any existing data in this section, it will show up like this:
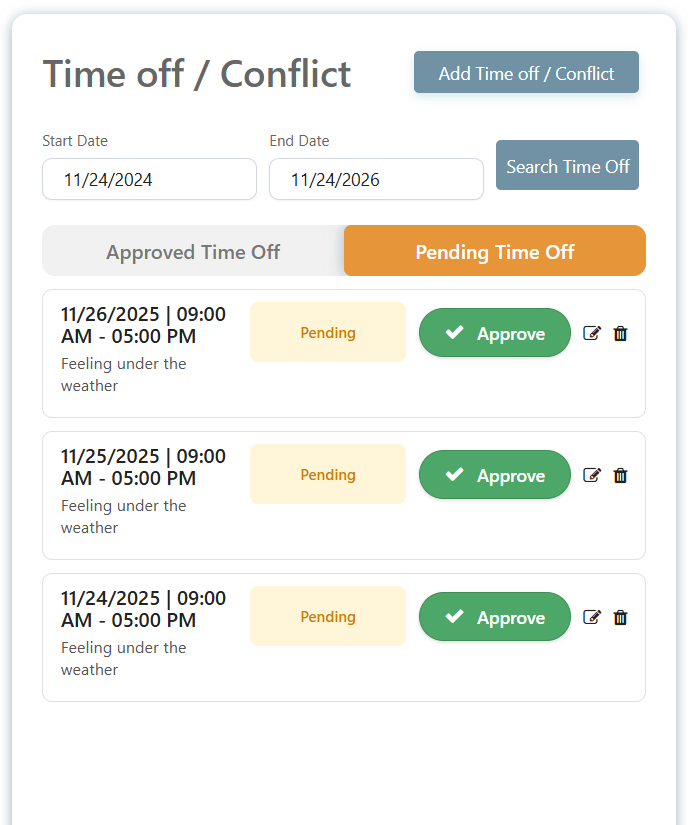
You can see the date range, time of the day, description and the status of your request.
Approve Button: If you click on approve, then your visit will show up in the approved section.
Edit Icon: Locate the time slot you wish to change, click the pencil/edit icon next to the time slot, edit and save.
Delete Icon: Click the trash can icon next to the specific time slot you want to remove.
Approved Time Off
When your requests for time off/conflict have been approved, they show up in the approved time off section.
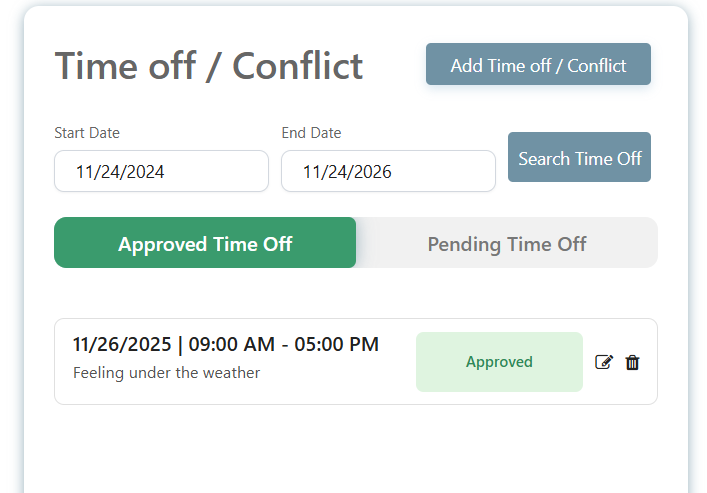
You can see the date range, time of the day, description and the status of your request.
Edit Icon: Locate the time slot you wish to change, click the pencil/edit icon next to the time slot, edit and save.
Delete Icon: Click the trash can icon next to the specific time slot you want to remove.
If you edit any information in a slot present in the approved time off conflict, then the slot will go back to the pending time off column for further approval.
Templates Section
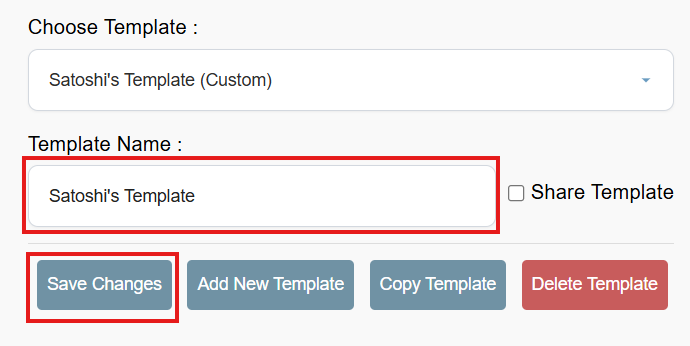
This section provides an overview of which template you have selected, as well as the ability to rename, delete, copy, and share a template.
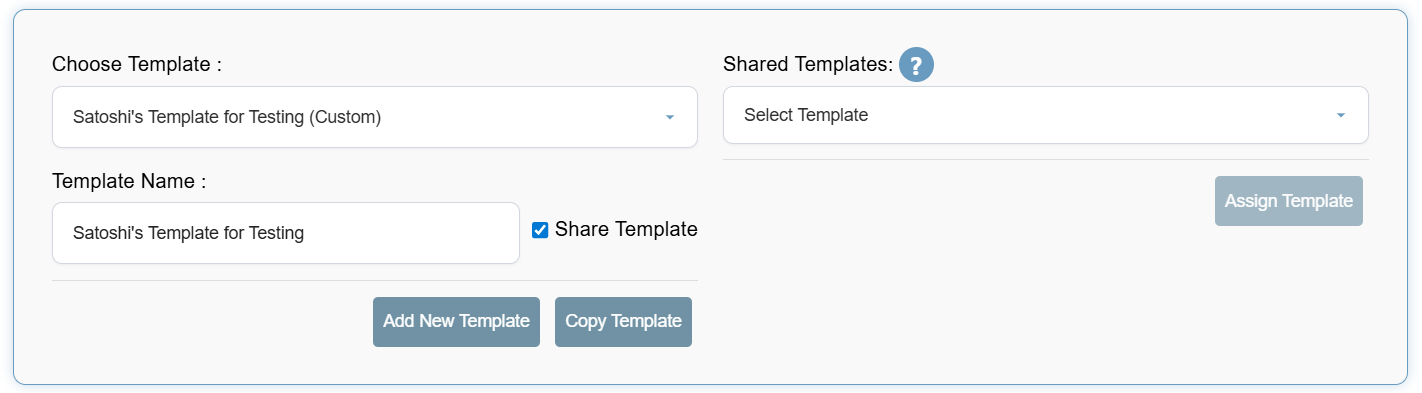
Adding a Template
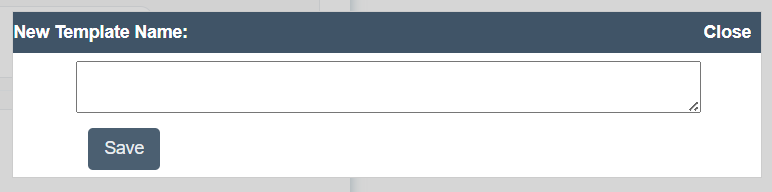
To add a new template:
Click the Add New Template button in this section
Enter any name for your template.
Click Save. The system will process your request, and your template will be available in the "choose template" dropdown.
Choose a Template
You can choose any availability template you like and start adding your time slots.
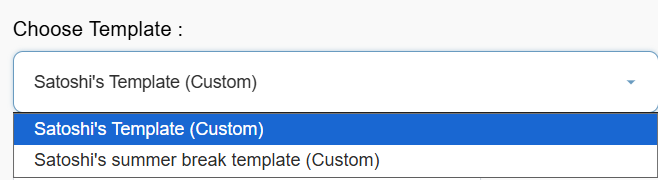
If you want to rename a template, just click on the template name, retype, and save.
Share Template
If you have created a template which you would like to use with other users, then tick the checkbox next to "Share Template" and click save.
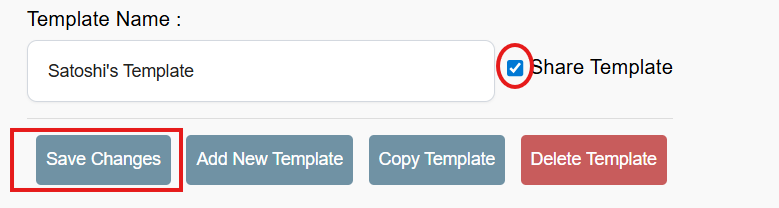
Other users will be able to see the shared template in the "Shared Template" dropdown.
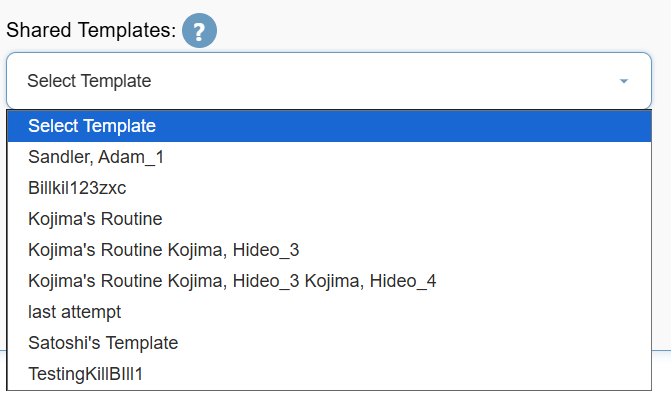
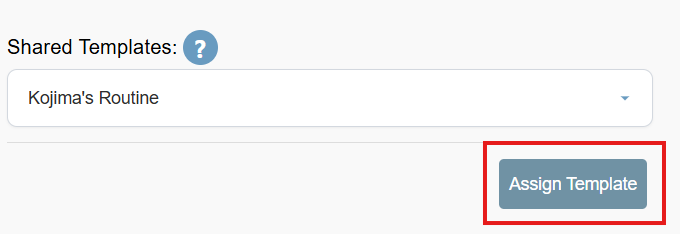
If you want to use someone else's template, then just select their template from the dropdown (only if they have allowed sharing) and click on the "Assign Template" button. All their availability calendars will appear on your screen.
If you already had some data in your template before you assigned someone else's template to yourself, then you would see an overlap between your slots and theirs.
Delete Template
Click on the "Delete Template" button to delete a selected template.

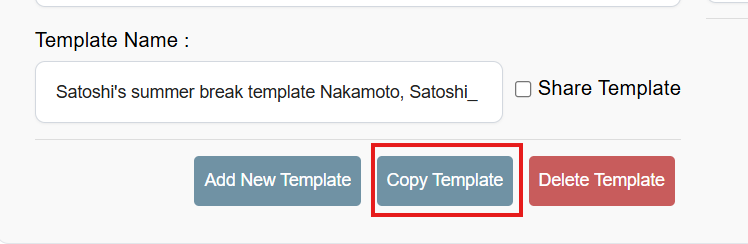
Copy Template
Click on the "Copy Template" button to make a copy of your existing template. The copied template will show in your template dropdown.
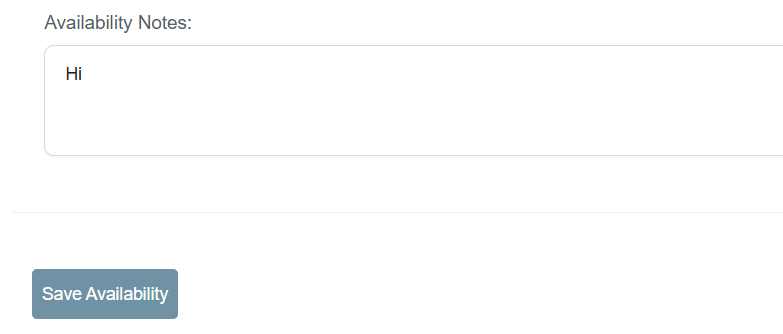
Availability Notes
Feel free to mention any notes, reminders, or information you want in this area and click the "Save Availability" button. The content you enter will only be visible to you.