Care Plans
Overview
Once your client's basic demographics and authorization data have been entered, it is time to build the care plan which outlines care plan items for the client. Ankota uses the care plan to define the questions at the end of a caregiver’s visit through telephony and the mobile app. Typically, care plans are assigned directly to the client, but please note you can ask for generic/"universal" care plans to be assigned directly to the visit type if desired.
If you are looking for information on retroactively reporting care plan items, check out Rework, Missed Visit, and On Hold Functionality | Ankota Help Center (helpsite.com).
This article includes the following sections:
Assigning Care Plan Items from Care Plan Categories
Creating & Assigning a Universal Care Plan (Legacy)
Creating/Copying a Care Plan
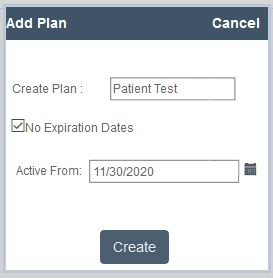
To create a Care Plan, select the Care Plan tab in the Client's record, then click New.

Accept the default care plan name, which is the same name as the client, if this is a unique care plan. (This will make it easier to manage care plans overall should you use care plan templates in the future.) If this will be a care plan used by more than one client, give it a clear label, such as Tier 1 Care Plan.
If your care plan does not have an expiration date, you are done and can click Create. If you need an expiration date, you may set an expiration date by unchecking the box next to "No Expiration Dates." Once the end date is set, you can click Create.
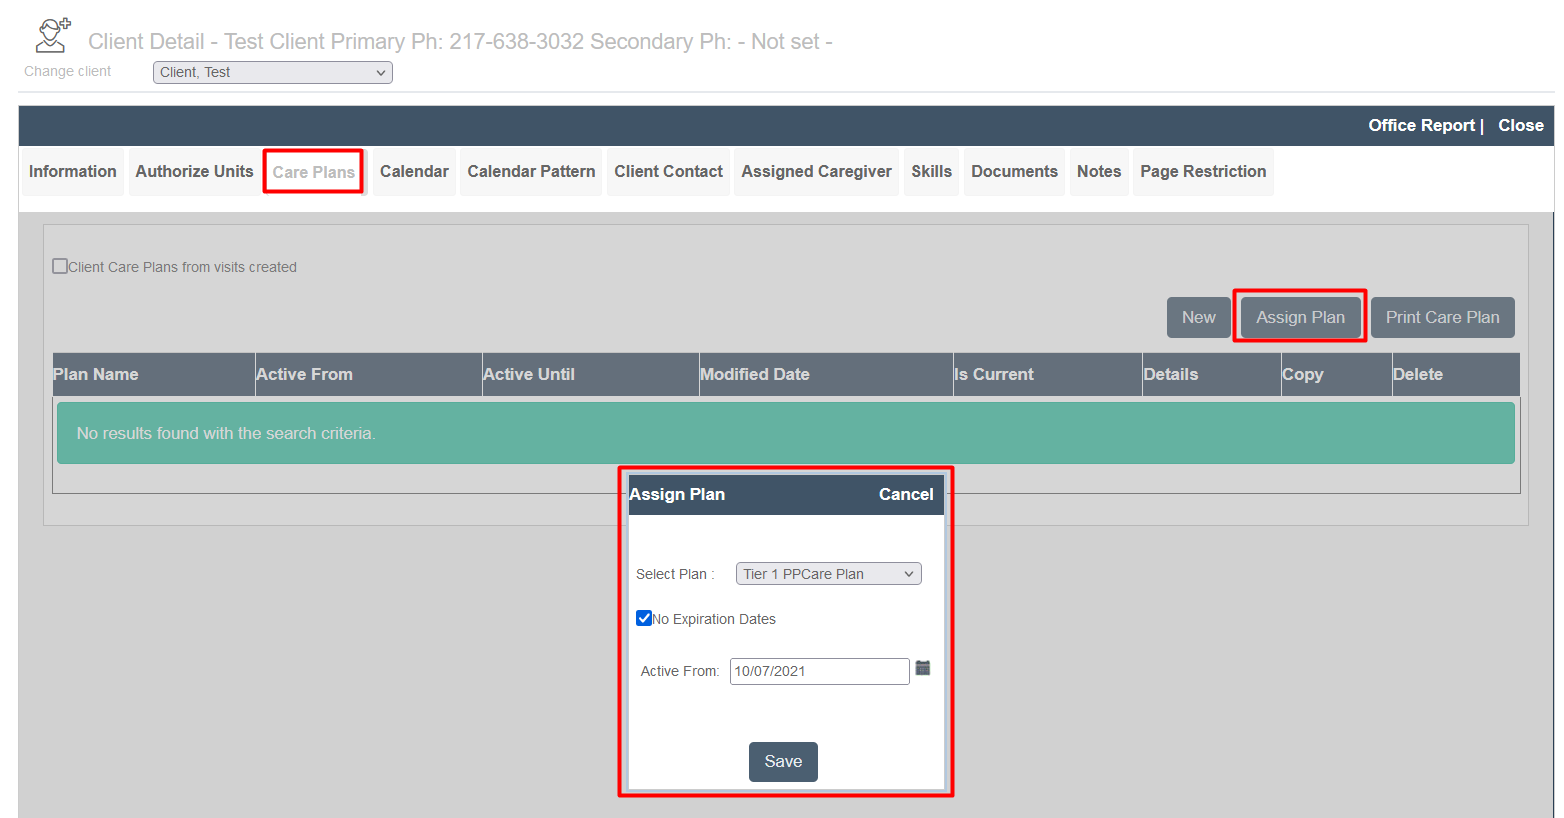
Once a care plan is created, you can copy this care plan in the future as follows:
- Enter the client's profile
- Click the Care Plan tab
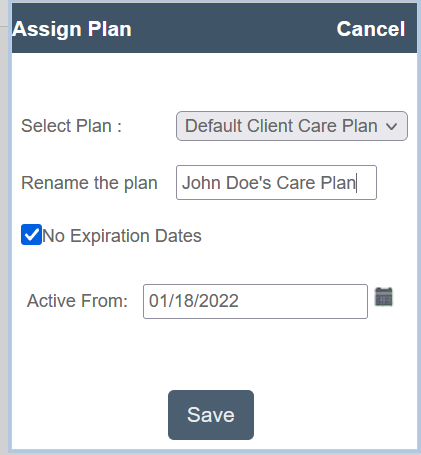
- Click Assign Plan
- Select the template you wish to copy
- Rename the plan
- Adjust the dates if needed
- Save
Assigning Care Plan Items from Care Plan Categories
After the plan has been created, click the Plan Name that you wish to update. In the example below, that would mean clicking on the name Paul Cezanne.
From here you can choose to update your care plan categories. Categories will vary according to your organization and your state's requirements, but some common categories are:
- Personal Care
- Homemaker
- Advanced Personal Care
- Respite
- Advanced Respite
- CDS
- Private Pay
To assign care plan items to the categories, click Update next to the appropriate Care Plan Category.
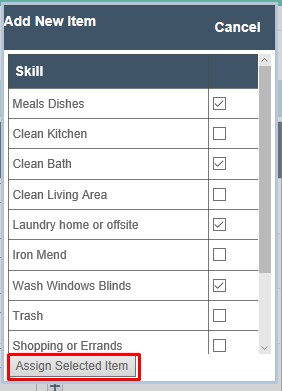
Select the appropriate items with the check box to the right and then click Assign Selected Item.
Now that the care plan items have been assigned, users can:
- Add specific notes
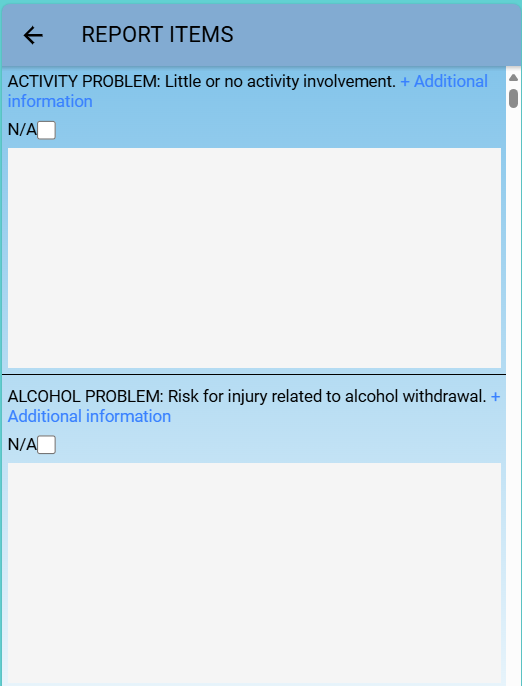
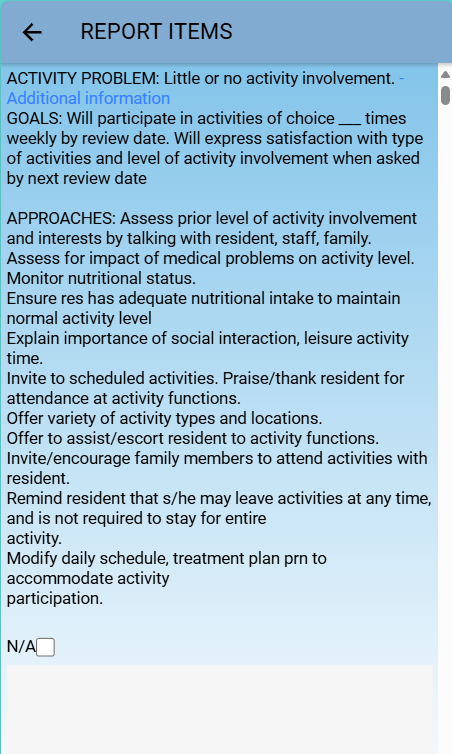
- Notes when entered are visible to all caregivers using the mobile app. These notes can be helpful in outlining the details of a care plan item. For example, a care plan item might be assist with mobility, and the Note may say "Stay on the client's weak right side."
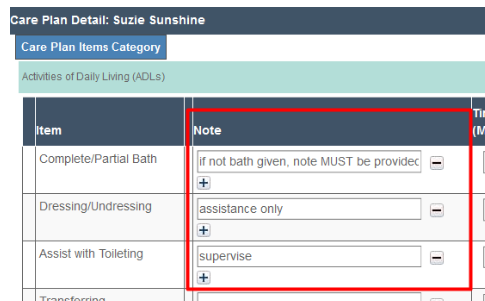
- You can include blank lines for clarity/organization in long notes if needed. Exceptionally long notes will be minimized with an "Additional Information" button.
- Add a Min and Max times per week
- If you wish to limit how many times per week you want to ask about a care plan item, you may set limits in the Times/Week section. For example, you could limit Make Bed/Change Bed Linen to 1-2 times per week. In this case, after asking the question and receiving 2 confirmations that this care plan item was completed, the question will no longer be asked. To have the item be reported on every visit, you may leave the min and max as blank.
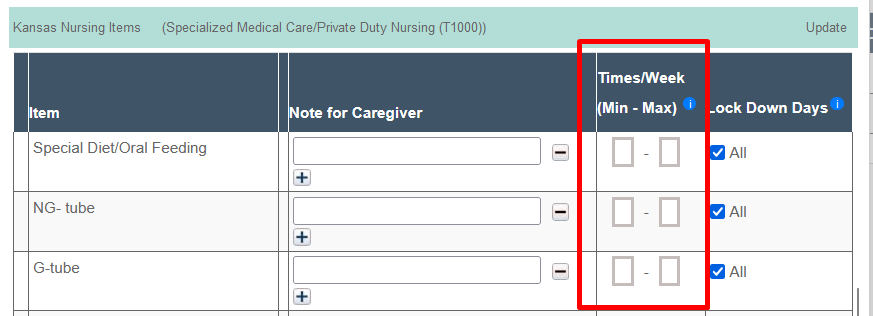
- If you wish to limit how many times per week you want to ask about a care plan item, you may set limits in the Times/Week section. For example, you could limit Make Bed/Change Bed Linen to 1-2 times per week. In this case, after asking the question and receiving 2 confirmations that this care plan item was completed, the question will no longer be asked. To have the item be reported on every visit, you may leave the min and max as blank.
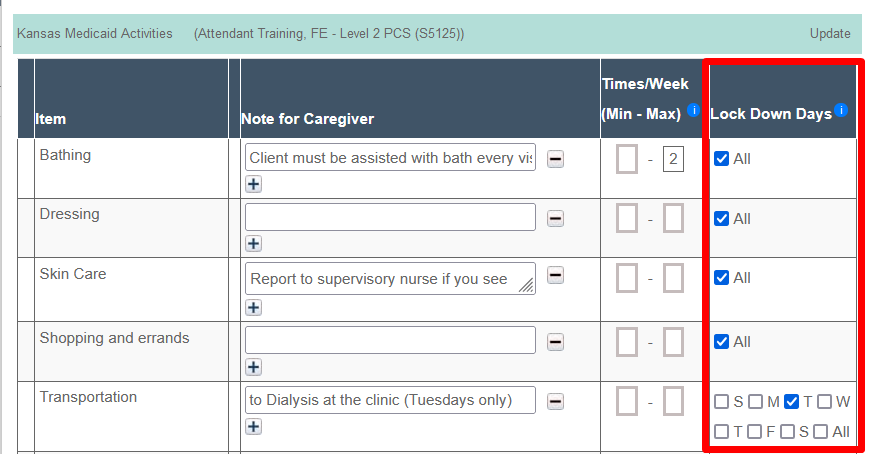
- Uncheck All to define specific days of week
- On the other hand, you may need to set limits by days. If you have a unique event that can only be asked about on certain days, such as a Friday Bingo social event, you will want to set the specific day to be Friday. Only do this with items that truly can't be performed on other days, however. If this visit is rescheduled to Thursday, it will not ask about this question - which is perfect for a once-a-week social event like Bingo or a doctor's appointment, but wouldn't work for laundry.
Creating & Assigning a Universal Care Plan
You can now copy an existing care plan and re-name it using the Assign Care Plan button at any time.
Alternately, you can use the legacy function to create care plans at the Care Plan (Settings) level, then assign the care plan on a client-by-client basis.
Click Settings, then Care Plan. (Care Plan may be under the subsection Services Settings in some environments.) Then click Add New Plan.

In this location, adding a new care plan will look different than at the Client level, but the concept is the same. Give the plan a name, leave the plan type and plan status defaulted, and then check the box next to each appropriate care plan item.
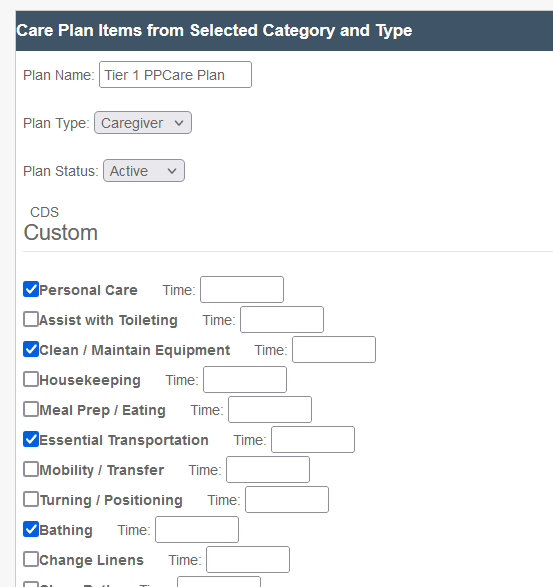
Scroll down and click Save Plan before exiting.

Going forward, this plan will be available to Assign under each client's Care Plan tab.
Editing a Care Plan
To edit a care plan, simply click on the care plan's name (which is typically the client's name) under the care plan tab. This will open the care plan, at which point any and all care plan items can be changed, added, or deleted.
No Care Plan
In some states, there is no care plan and care plan items for specific visit types. This is common for Respite Care visits. As of 5/10/24, visits that have no care plan and no care plan items will no longer be flagged for violation in the visit approval dashboard. This is universal and is not a configurable option.
Other
For care plans where there are time-specific care plan items, see Multiple Care Plan Management.
Creating Care Plans
For the next step in adding a client, go to Calendar-Based Scheduling.

