Calculating Billing
Overview
Ankota users will calculate billing regularly as part of the process of ensuring their invoices are timely and accurate. In order to calculate billing, please note that you will first need to ensure that visits are closed and approved, and any exceptions have been addressed.
Calculate Billing
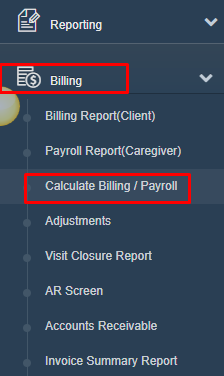
- go the Main Menu
- click Billing
- click Calculate Billing/Payroll.

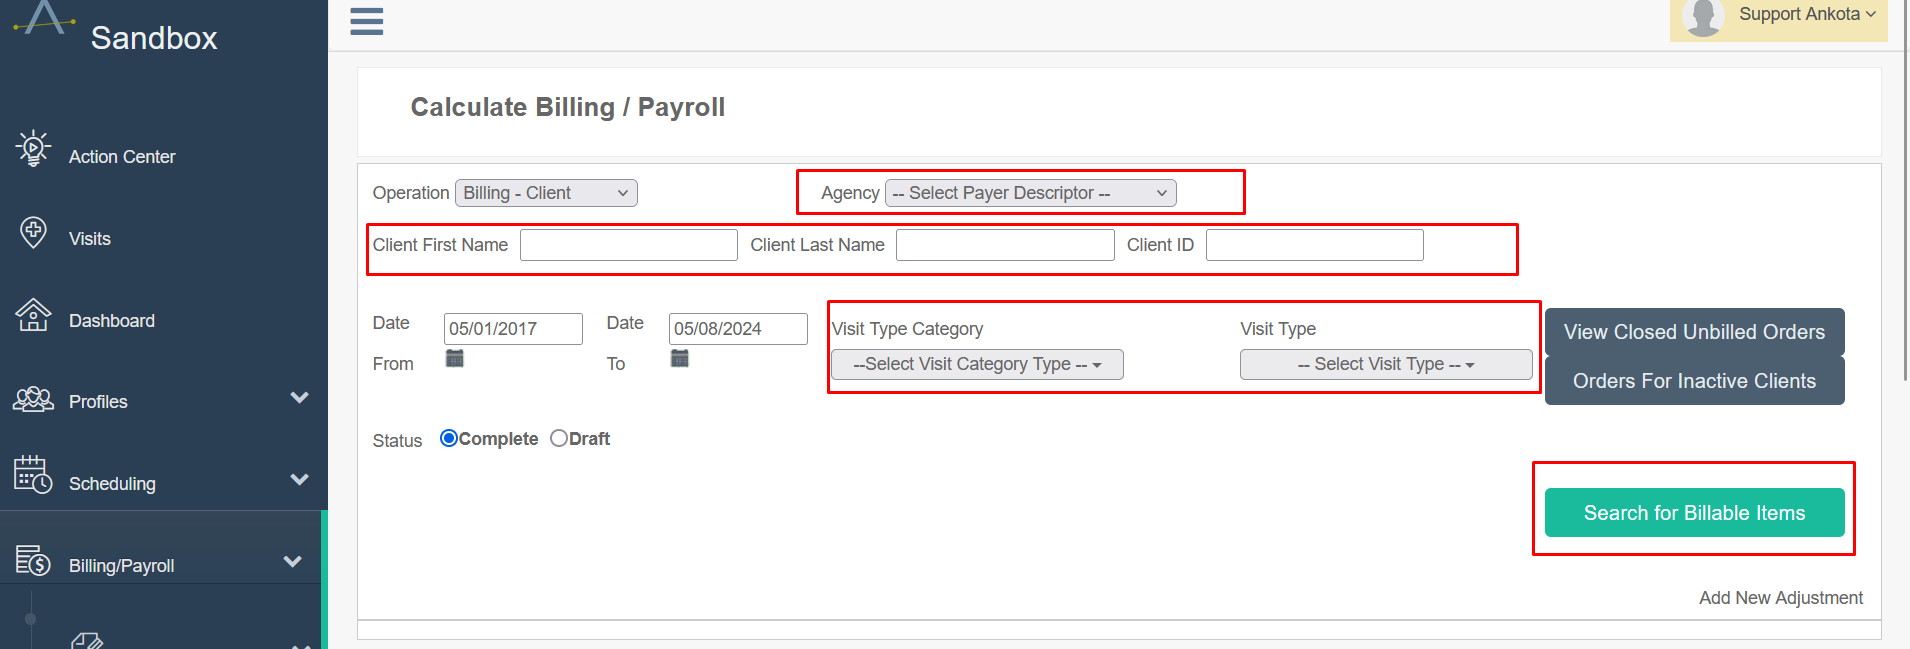
Next to Operation, select Billing - Client from the drop-down menu and enter the date range. Best practice is to set the start date to your Ankota start date to ensure any previously unbilled visits are visible. Please note we will never bill for the same visit twice, so there is no danger in choosing the earliest possible start date. The system will only pick up the the unbilled visits.

NOTE: for clients that do not need to review billing drafts (such as clients that ONLY use the billing process to trigger sending data to an aggregator), you can change the status to Complete. This enables you to skip the Billing Report page review and go straight to complete.

If you wish to filter for a particular payer, client, visit category, or visit type, you may also do so at this time.

When you are ready, click Search for Billable Items. A list of visits will appear.

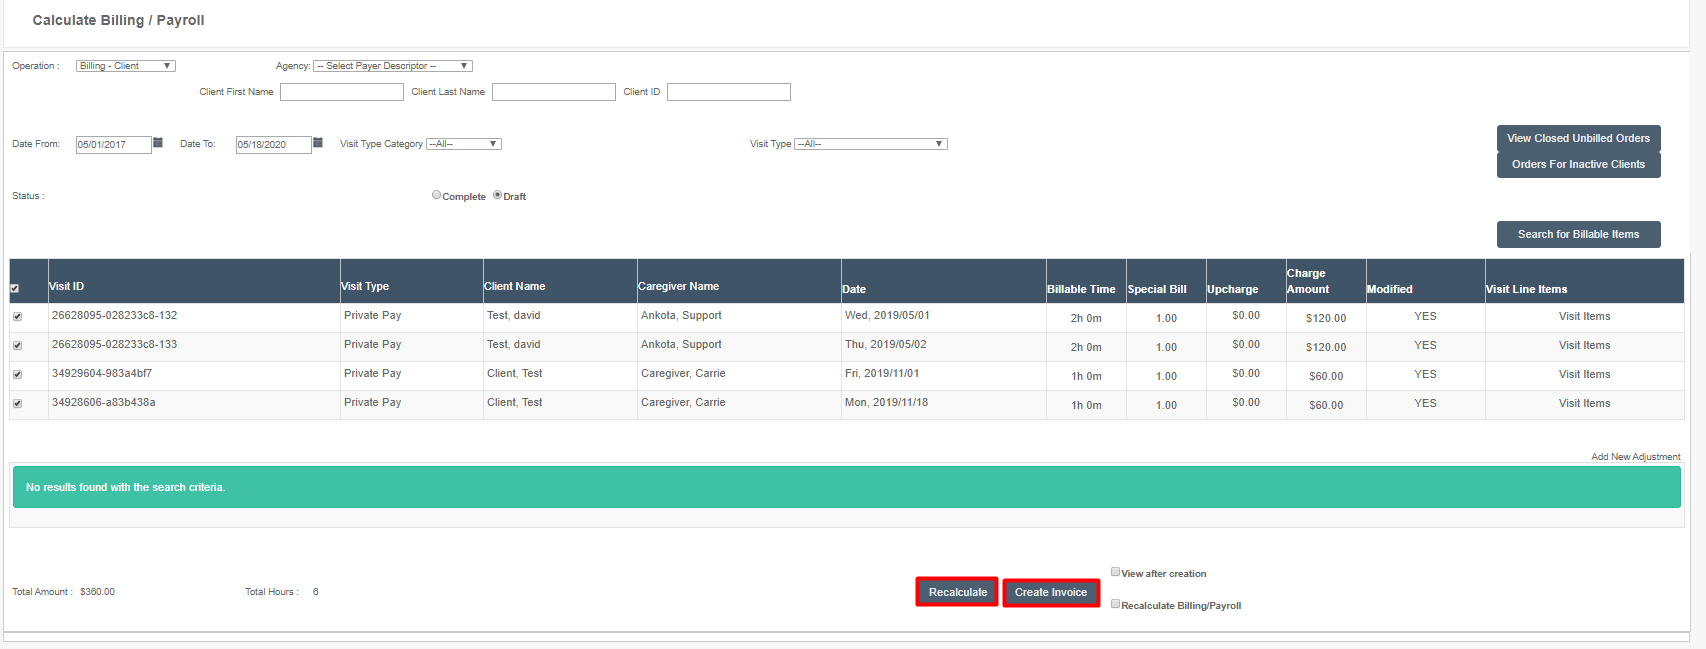
Closed visits can then be previewed and reviewed for issues, such as a zero rate, and then investigated and corrected.
Possible issues
Possible issues may include any of the following:
- A new service type was introduced without an associated rate, or the rate is entered incorrectly
- Reach out to your Ankota specialist for assistance in adding this billing rate
- Visits are listed unexpectedly, or expected visits are missing
- Check your visit approval dashboard for unapproved visits
- Check your filters
- Check to see if visits were approved that should have been cancelled
- The billable length does not match your expectations
- Correct the visit as appropriate in the Visit Approval Dashboard
Once these issues are corrected, use the Recalculate button to refresh the report so all updates will be included. The Recalculate option is not necessary if your data was correct from the start. Once all data appears correct and ready to bill, click Create Invoice.

NOTE: There is a check box that says View After Creation next to the Create Invoice button. If you check this button, you will be taken to the Billing Reports page automatically after your invoices are created.

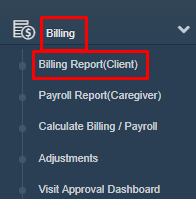
If you forget to check this button, simply click Billing from the main menu and then Billing Report (Client).

For the next step in this process, see Billing Report - Completing Invoices.
