Manual Visit Entry
Overview
When a visit needs to be entered into the system manually by an admin, Ankota gives Administrators the ability to report task completion and visit completion. These processes are usually handled one of two ways: through the Visits page, or through the Visit Approval Dashboard. This depends on how your company handles missing or incomplete visits. Please note that while Scheduled and On Hold visits can be closed out on the Visits screen, only Closed and On Hold visits can be viewed and modified in the Visit Approval Dashboard.
If you are looking for more information on having caregivers close out their incomplete visits themselves, see Rework, Missed Visit, and On Hold Functionality | Ankota Help Center (helpsite.com).
See below for further details on closing a visit manually as an admin.
This article includes:
Closing Visits via Visits Page (including visits that are Scheduled or On Hold)
Closing Visits via Visit Approval Dashboard (including visits that are On Hold)
Saving Paper Timesheets in Ankota
Creating Visits
If you do not have a scheduled visit already, you will first need to create the visit so that you have a visit to close. This can be done via Calendar-Based Scheduling.
Closing Visits via Visits Page
To close out a visit manually, whether it is in the status of Scheduled or On Hold, you can use the Visits page.
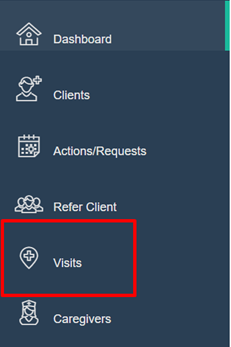
To begin, go the Main Menu, then click Visits.
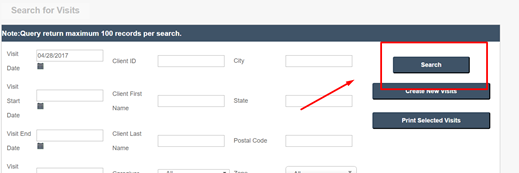
From Visits, set the parameters for the visit or visits you’d like to view and click Search.
Scroll down to view the Visit(s) from your search. Click on the icon at the end of the row.

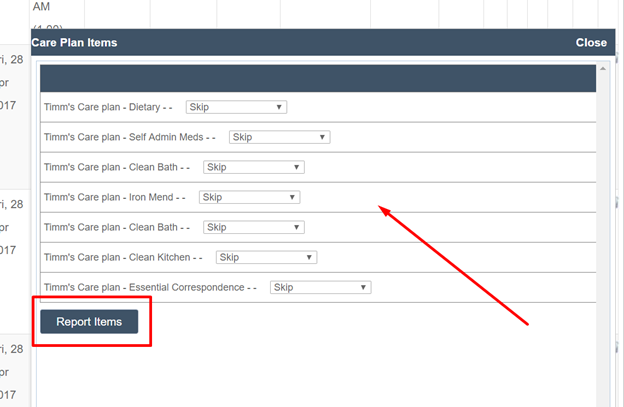
When you click on the icon, a box will appear. There you can select from the drop-down menus and report any tasks.
Be sure to click Report Items in order to save the information.
The following steps can be taken in conjunction with the previous three steps or they can be done separately, depending upon the scenario.
In order to Report Visit Completion, you first search for the visits(s) per the above instructions. You can either select a single visit from the list, a few, or all of the visits listed.
To select one or more, simply click the check box on the left of each visit you’d like to affect. Alternately, select all by clicking the check box in the top right corner of the visit list next to Select All.

Once you have selected the visit or visits you’d like to close, scroll down to the bottom of the screen to the cluster of buttons there and click Report Visit Completion.

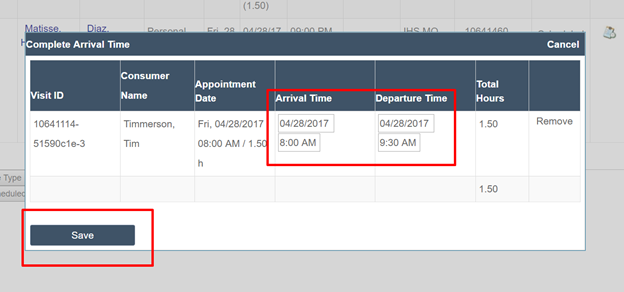
A box will appear where you can enter in the needed times. Once complete, be sure to click Save.
After completing these steps, you can now invoice for all closed visits.
For more, see the video below.
Closing Visits via the Visit Approval Dashboard
The Visit Approval Dashboard, where administrators can review visits which are placed On Hold or which have broken a company rule, can also be used to close On Hold visits as well as report care plan completion. (Scheduled visits cannot be closed via the Visit Approval Dashboard.)
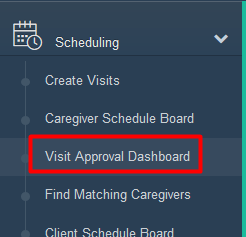
To access the Visit Approval Dashboard, you will normally go to Scheduling, then click the Visit Approval Dashboard. Please note that in some environments, it may be located elsewhere. Some organizations may also call this the Visit Closure Report.
Filter for the appropriate visits. If you are specifically looking to manually close out On Hold visits, you will probably want to filter for that status.
Click on the pencil and paper icon next to the visit to open its details.
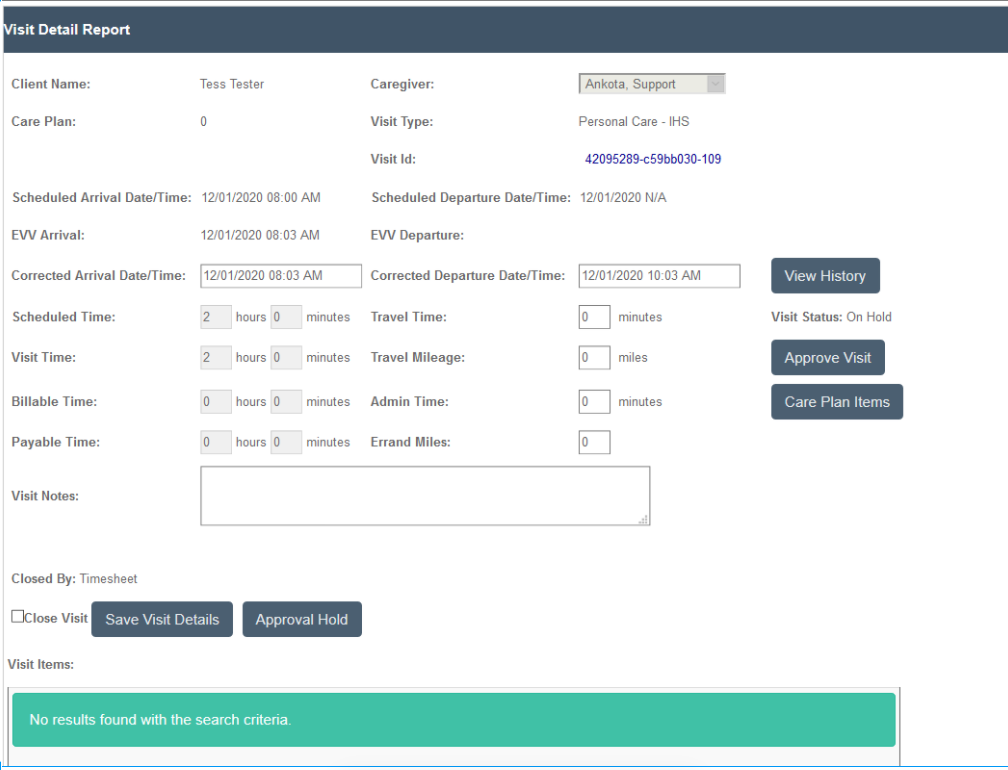
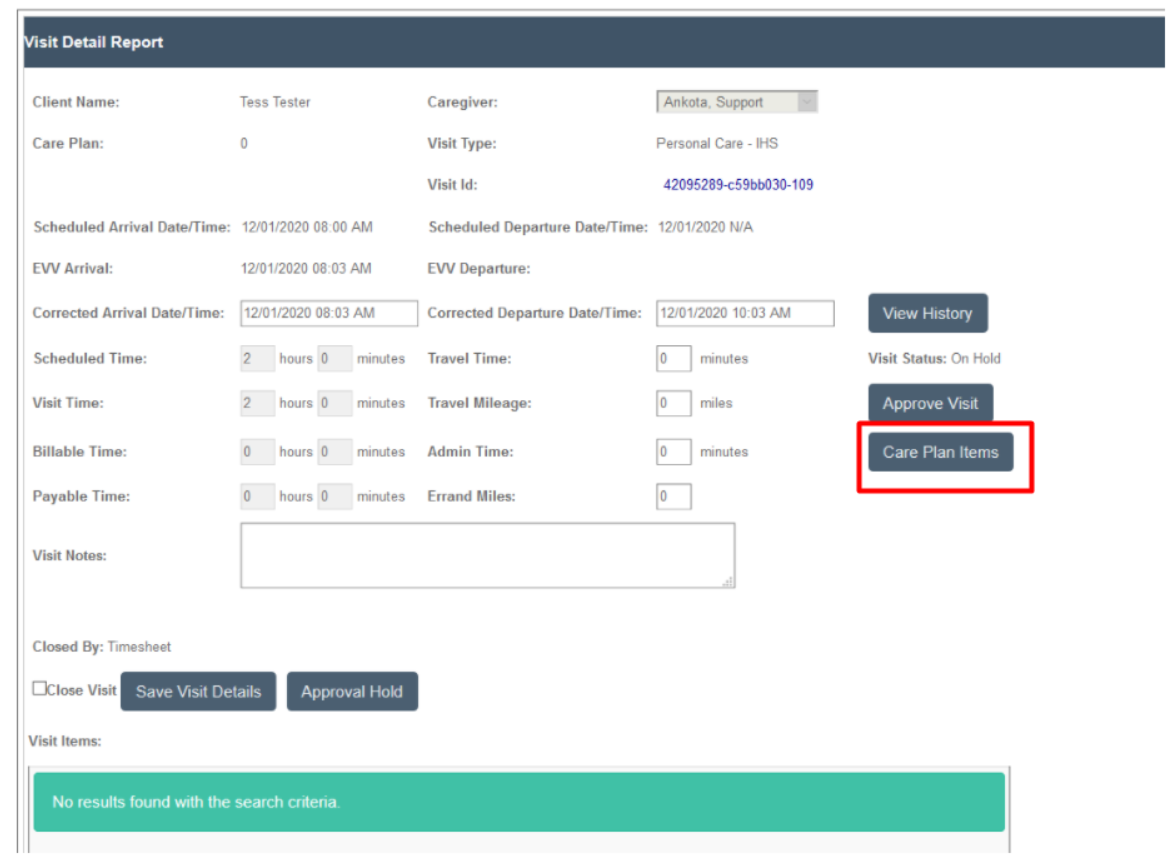
If you wish to update the care plan items status, you can do so at this time by clicking on the Care Plan Items button. This will open a new window where care plan items can be reported.
Next, enter the corrected times in the Corrected Arrival and Corrected Departure fields, click the checkbox next to Close Visits, then click Save Visits Details. This will cause the visit to be closed, rules to run, and for the billable and payable times to populate.
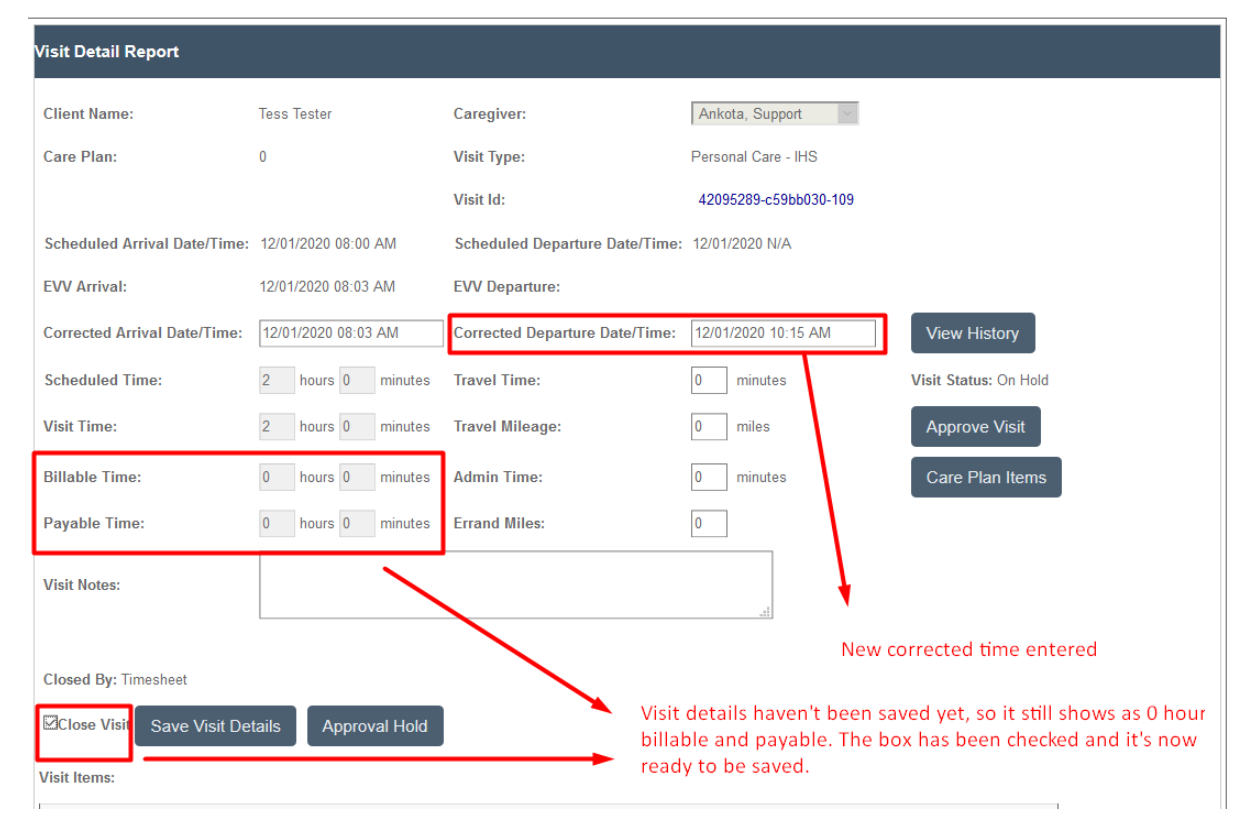
This will result in the updated, closed visit with payable and billable times.
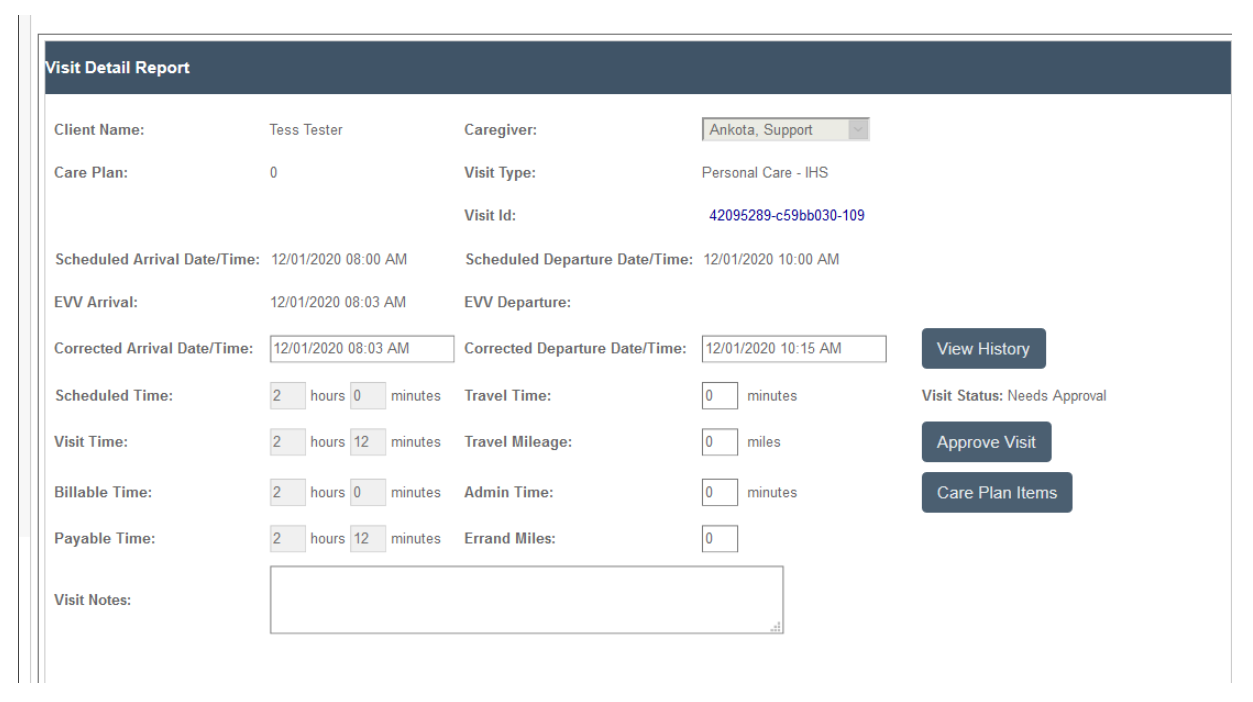
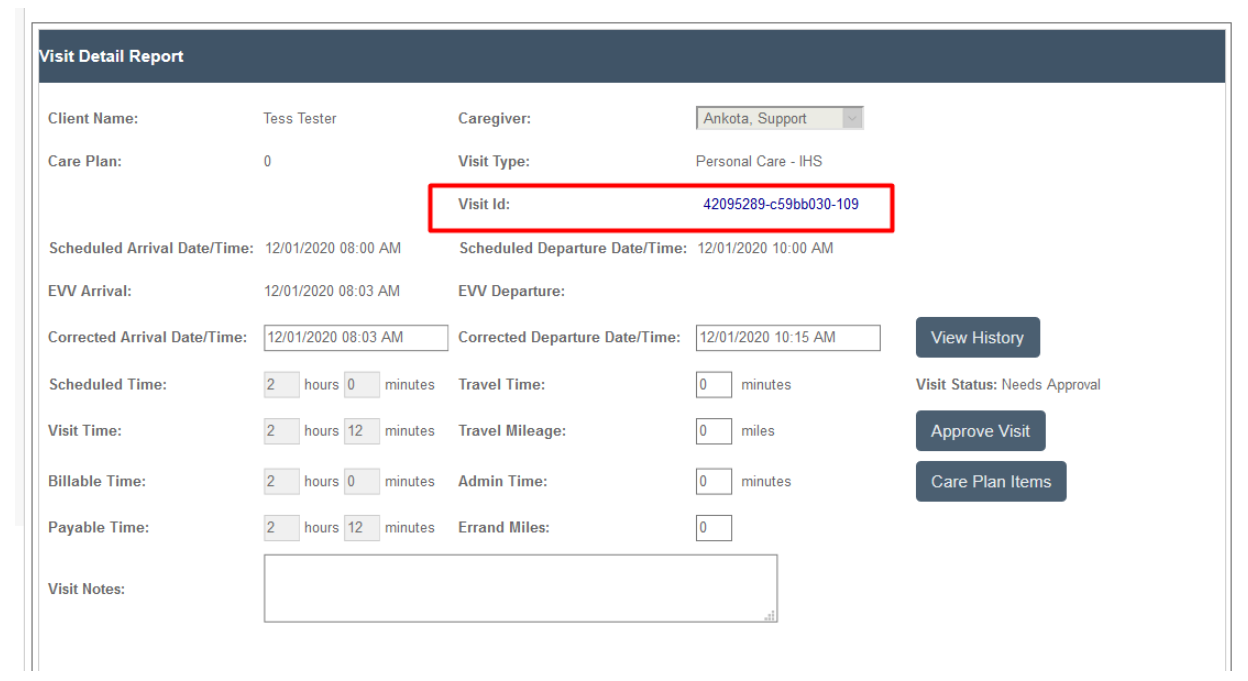
If you wish to upload supporting documentation as you are closing the visit, click on the blue hyperlinked Visit ID to open Visits on another page.
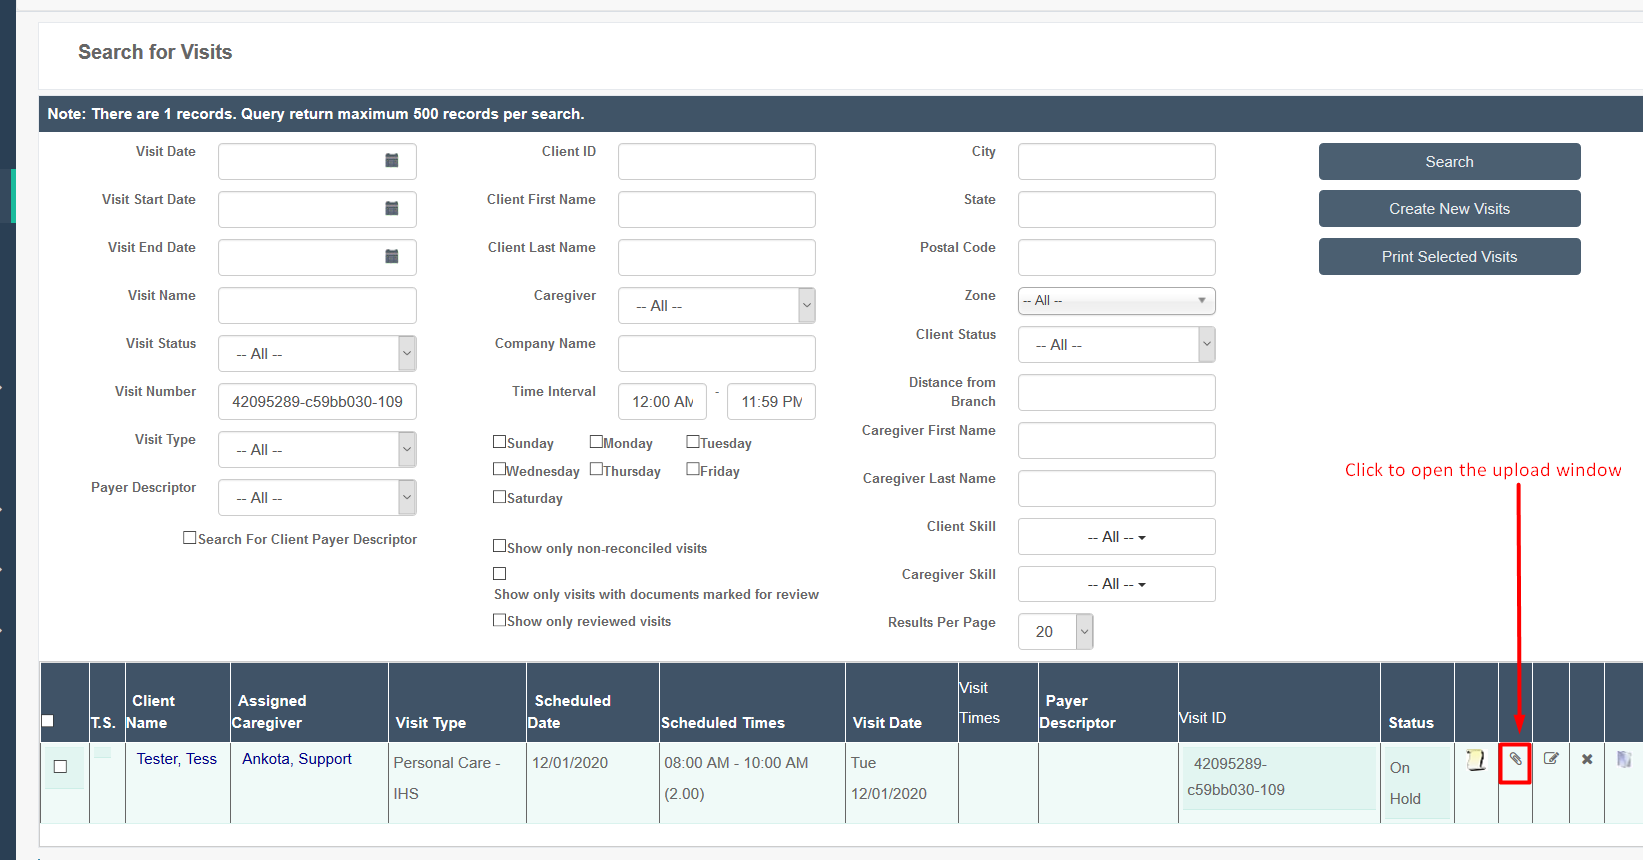
Then, on the newly opened Visits tab, click the paper clip icon next to the visit to upload a copy of your scanned timesheet or other supporting documentation.
Saving Paper Timesheet in Ankota
Paper timesheets can be maintained as physical paper records, but can also be uploaded directly into Ankota for ease of reference. Prior to uploading a copy of the timesheet, it is best practice to first close out the visit and report care plan items. See Closing On Hold Visits for a walkthrough of this process. If the visit is still in the status of Scheduled, rather than On Hold, just close out the visit before you begin reporting the care plan items. (Visits will not show up in the Visit Approval Dashboard unless they are Closed or On Hold.)
Uploading the Paper Timesheet
To upload a paper timesheet for recordkeeping, open the Visits page, filter for the visit, and scroll right and click on the paper clip attachment. This will allow you to upload a scanned copy of your paper timesheet. (You will need to scan a copy of the paper timesheet to your computer prior to the upload.)

Clicking on the paper clip will open a pop-up window. Click the Upload button.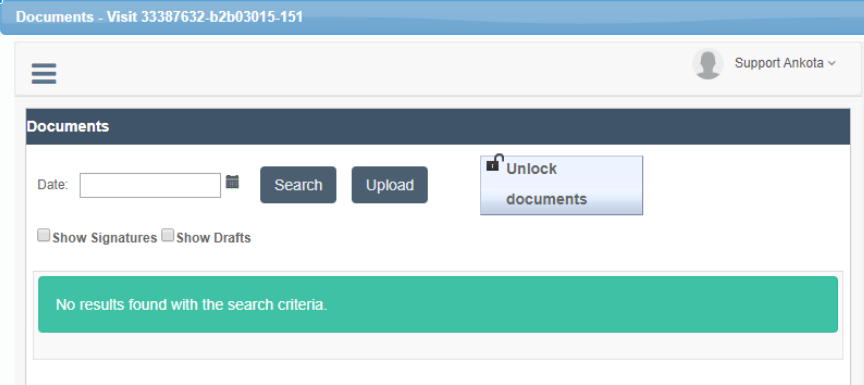
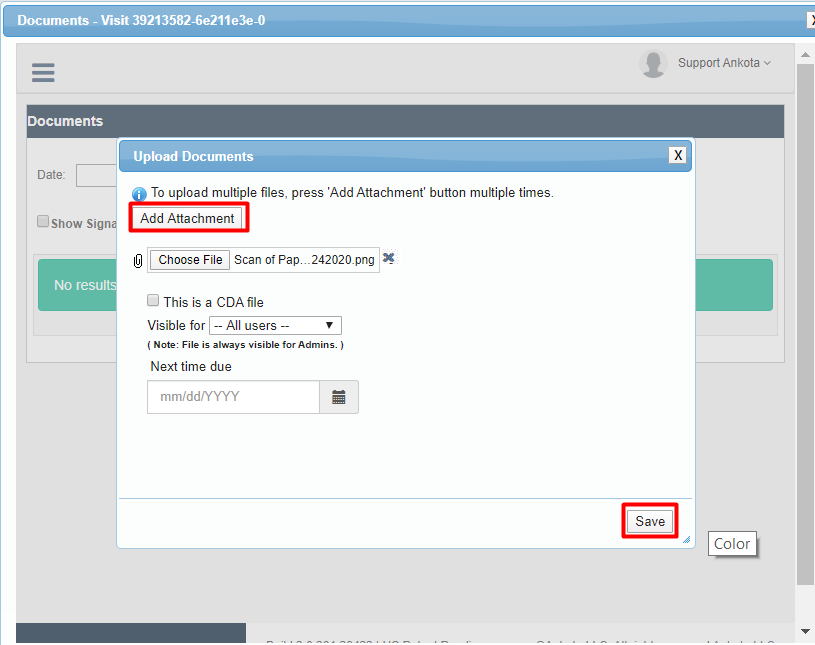
Next, click Add Attachment. Select the appropriate file from your computer, then click Save.
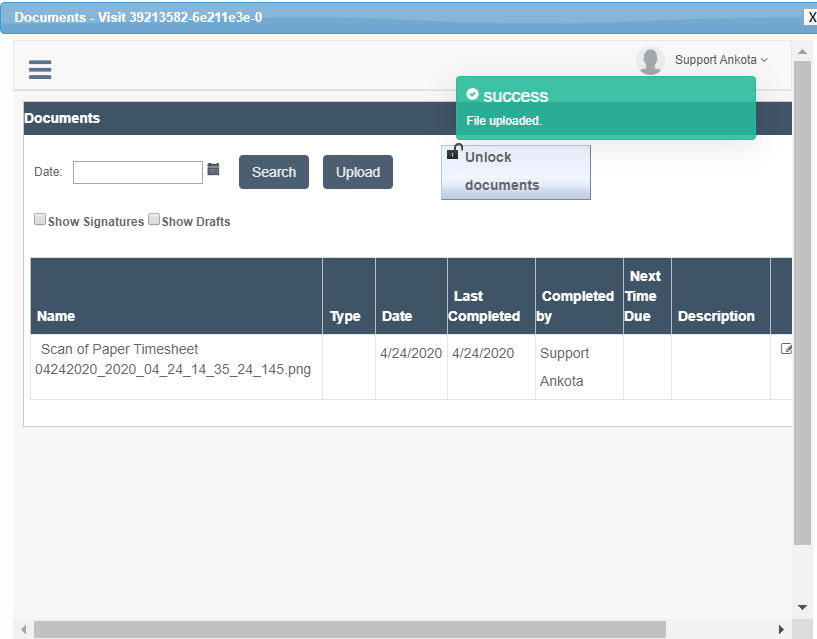
The file will be saved on the Visit.
Alternate Options
If you are looking for other timesheet options, these are some options:
- A report that shows what was completed, including a signature: Visit Report Printout (under Reporting --> Service Detail)
- A report that shows EVV clock-in/out times: EVV Audit Report (under Reporting --> Service Detail)
- A back-up digital timesheet caregivers can fill out in the system: this can be set up if requested (option may vary by state)

