

Authorizations
Overview
Medicaid and V.A. clients will be provided with plans from the state authorizing appropriate care plan items and hours. (Alternately, if a client is private pay, your organization will have contracted hours with the client, which you may wish to track via authorizations).
General client set-up is to first enter demographics, then authorized units. By adding this authorization, the Ankota system will not only track the client's used units against the authorization and prevent over-billing, the authorization will also be provided as a reference when scheduling.
For the next step in adding a client, go to Care Plans.
IMPORTANT:
Note that the Ankota default is to apply the authorization and BLOCK the caregiver clock-in if the client does not have:
an active authorization for this visit type
with good units left for the date
that permits work today (not limited by days of week)
Some customers have this feature disabled ("Skip Auth Check"), but otherwise it is the default.
Simple Authorization Overview
This article includes:
Editing Units on Active Clients
Scheduling without an Authorization
Notify Caregivers of Remaining Authorization in Telephony/Mobile App Ionic
Authorization Flags on Individual Client Calendars
Standard Authorizations
Adding an Authorization
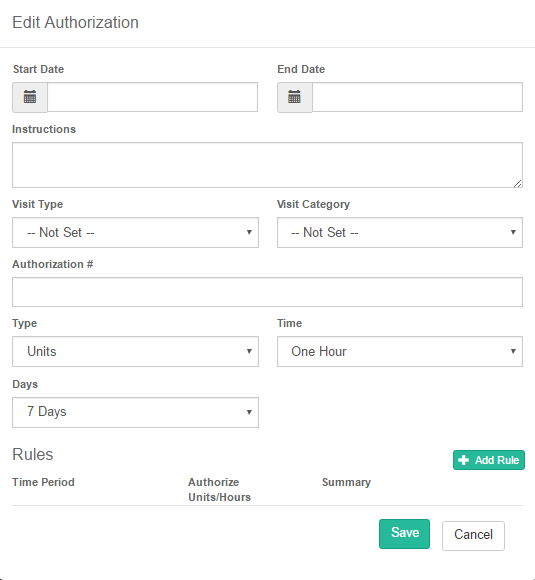
To begin, go to the Authorized Units tab within the client's record.

Next, select + Add New and enter the Start Date and End Date as well as the other authorization information. A client may have one or several active authorizations, so long as there is no more than one active authorization per visit type.
Critical notes:
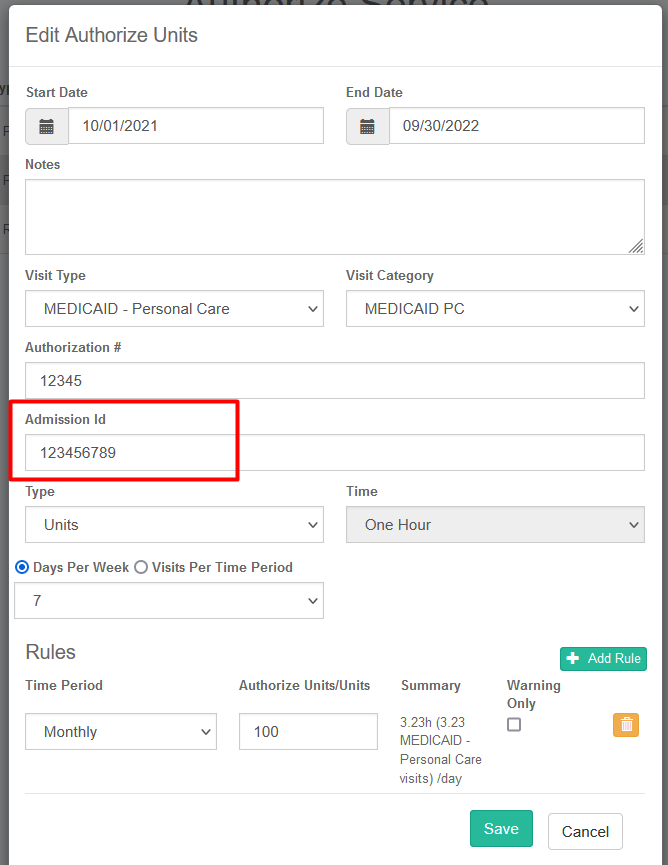
An Admission ID is usually necessary on your authorization to confirm the billable ID for their insurance; this training is part of your implementation (see more below)
For historical records, when a client receives a new authorization, you should enter an end date in the previous authorization and begin a new authorization for the updated contract. You can add any necessary instructions in the Instructions box. Otherwise, add or select the information in each window from top to bottom.
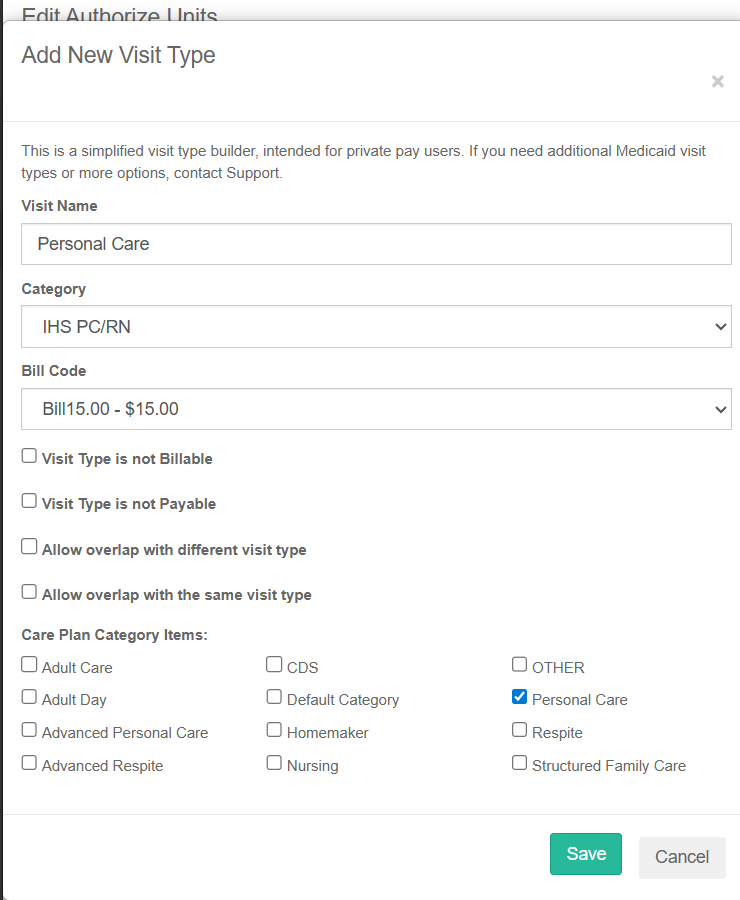
For Add New Visit Type, this creates a whole new visit type. Typically, you want to skip this button and go to the drop down if you already have the visit type in your environment.

Overlapping authorizations will result in billing errors.
-
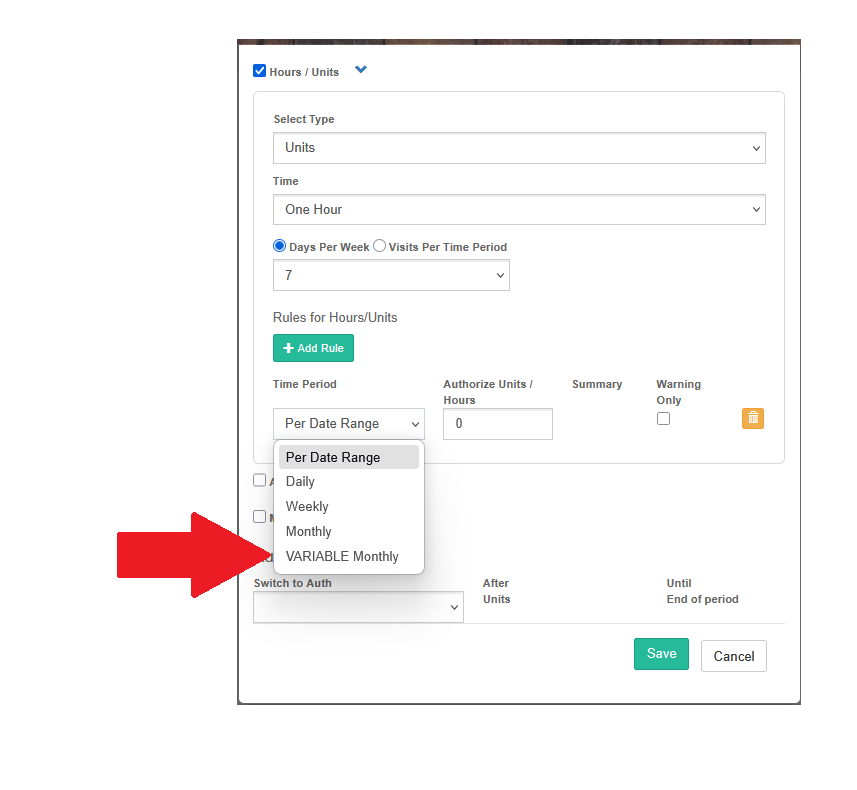
In the case of variable monthly authorizations, you can select the variable monthly option and enter the units on a month-by-month basis for year-long authorizations
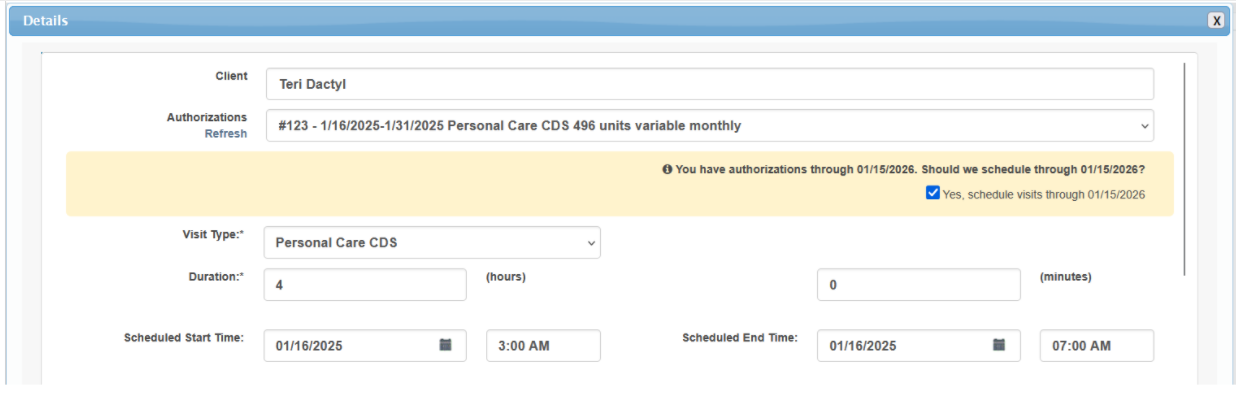
When scheduling variable monthly authorizations, you can choose to schedule out the full year using the best average time
You can titrate (adjust) these schedules later to match the required units as needed
Titration can also be automated
Variable Monthly Authorization with Option to Schedule All Months
Biweekly Authorizations
Biweekly Authorizations are entered somewhat differently than standard authorizations.
To start,
-
Build a simple two-week authorization using the Date Range function
Be sure to include ONLY the first two weeks
Be sure to include the total # of units for two full weeks
-
Then COPY that authorization
In the copy, change the suggested end date to the actual end date
Repeat every: 2 weeks
Short video below.
Admission ID
Depending on your organization's needs, the admission ID may be required or not; this is typically based on whether an MCO insurance requires a second ID beyond the Medicaid ID. Historically rare, it is fast becoming the standard because of the increase in MCOs.
If you have been directed to enter the admission ID, be sure to enter the billable ID (such as the Medicaid ID or MCO ID) in this field consistently in all authorizations. Otherwise, you will not be able to successfully bill. In some cases, your data will not even be accepted by the clearinghouse without this field being filled out.
Defining Rules
After you have entered the basic authorization information, you will also need to define the rule of the authorization. To do so, follow the directions below.
With the authorization open, scroll to the bottom. Next,
Select + Add Rule
Enter the time period through the drop-down
Enter the authorized units
-
A summary of hours per day will be calculated based upon the data in the rules, the type and the time
This is only a summary and a suggested guideline.
Save

Editing Units on Active Clients
To edit units on active clients,
Click Clients
Select the client
Click the Authorize Units
Click Edit
Scroll to the bottom, edit the number of units, press tab to see units per visit, then click Save.
Authorization Transition
Auth Transition Overview
Many private pay and CDS clients need to transition from one authorization to another within the same period. Common examples include:
After a set number of CDS units are used, remaining services should transition to CDS ILW (typically monthly Medicaid)
After a threshold of standard hours is reached, additional hours should move to a bulk discount visit type (typically weekly for private pay)
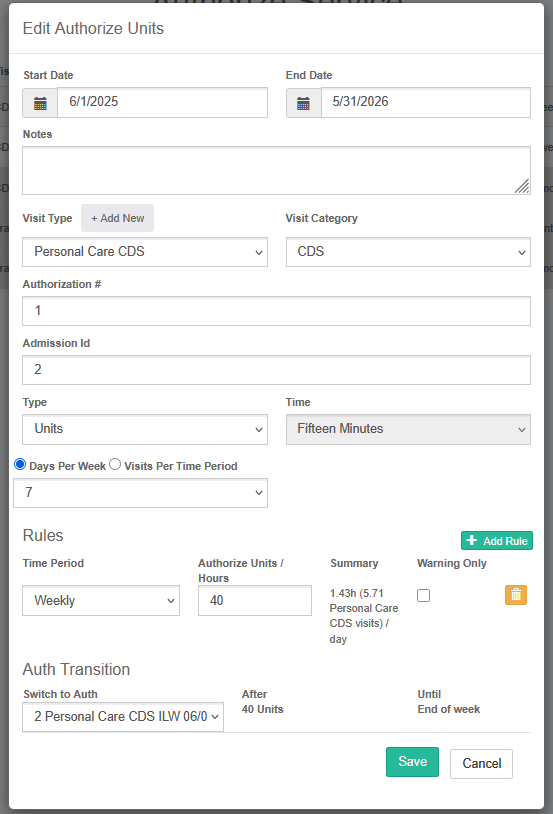
The Authorization Transition feature allows you to automate either kind of "transition" by linking two authorizations together.
How to Set It Up
-
Create both authorizations
The “originating” authorization (e.g., CDS)
The “next” authorization (e.g., CDS ILW)
-
Link the authorizations
In the originating authorization, select the next visit type in the Auth Transition section
-
Schedule using the originating authorization
Schedule visits for the combined total units of both authorizations for the full period
Example: If Auth 1 = 100 units and Auth 2 = 100 units (monthly), schedule 200 units

How It Works
The system tracks usage against the originating authorization first.
Once those units are exhausted, Ankota will:
Automatically convert remaining scheduled visits to the next authorization’s visit type
Split any in-progress visit, ending the original visit and creating a new one under the next authorization
All remaining visits in the period will continue under the new authorization
Example
First, prep the authorizations and the schedule:
A Personal Care CDS authorization is set for 496 units per month
It is linked to a Personal Care CDS ILW authorization for 496 units per month
You schedule visits for the full combined total of 992 units, or about 8 hours/day
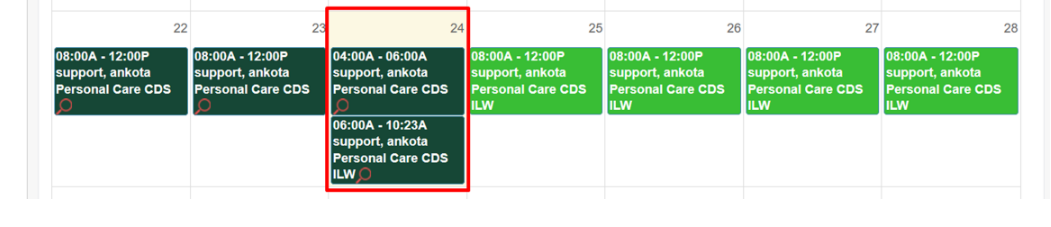
Once the 496 CDS units are used (about 15.5 days in a 31-day month):
The current visit will split
The old visit will remain CDS
The second visit for the day will be CDS ILW
All remaining visits for the month will also convert to CDS ILW
Key Reminders
Always:
Schedule using the originating authorization first
Include the full combined units for the period
Let the system handle the transition automatically once limits are reached

Scheduling
Scheduling without an Authorization
You can schedule without a true authorization. In some states or by request, your visit types may be defaulted to require an authorization, but not an authorization number. In other words, even if you are required to include an authorization, Ankota only turns on the requirement for an actual authorization number by special request. You can simply put in "placeholder" in the authorization number field and fill it out later.
So to clarify, there are three options:
Schedule without an auth for visit types that do not require one (such as office management visit types)
Schedule with an auth that has "placeholder" in the authorization field (most regular Medicaid visit types)
Override: system requires an actual number (turned on only by request)
Notify Caregivers of Remaining Authorization in Telephony/Mobile App Ionic
To configure:
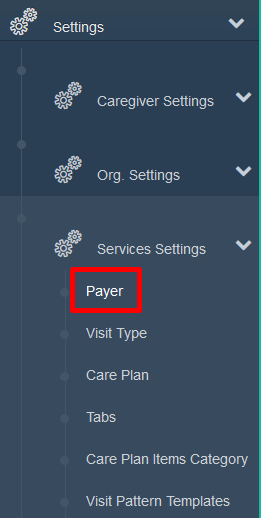
Go to Settings
Service Settings
-
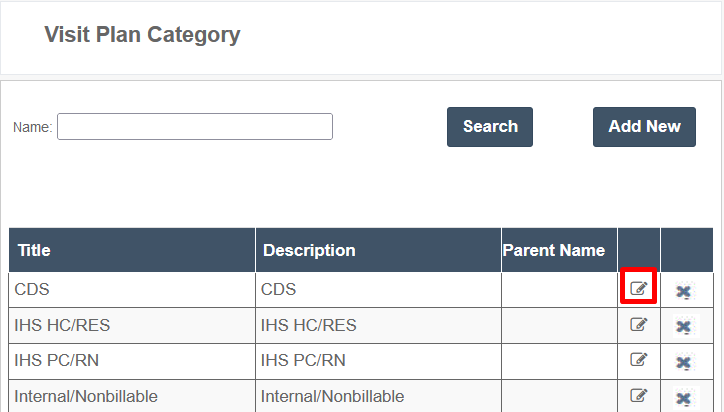
Payer (could also be listed as "visit plan category"
-
Select a category and EDIT
-
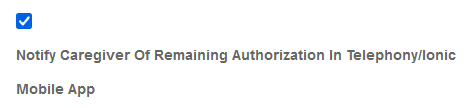
Scroll to the bottom and check configuration: Notify Caregiver of Remaining Authorization in Telephony/Ionic Mobile App
Click Save
Authorization Flags on Individual Client Calendars
One option for managing authorizations is to have them reflected on individual client calendars (configuration by request).
These authorizations reflect active authorizations, specifically the units that are scheduled, used, and remaining as well as the critical date range, visit type, and the approved units.
One blue banner reflects each individual authorization rule. If an authorization has more than one rule, such as 50 units/week but 2,000 units for the complete date range, two banners will be shown.
